This shoot was a long time coming! Bari of Honest Tea, and I had been working for months to make this shoot a reality. Over the course of a hot summer day in August, it all came together, and we got to shoot tons of social content for them. They had a lot of new product offerings alongside some of their tried and true favorites to work with, and honestly, it was one of the must fun shoots I’ve had all year. Thanks so much to the whole Honest team, especially Bari, and Olivia, who did an amazing job styling everything.


China Chilcano
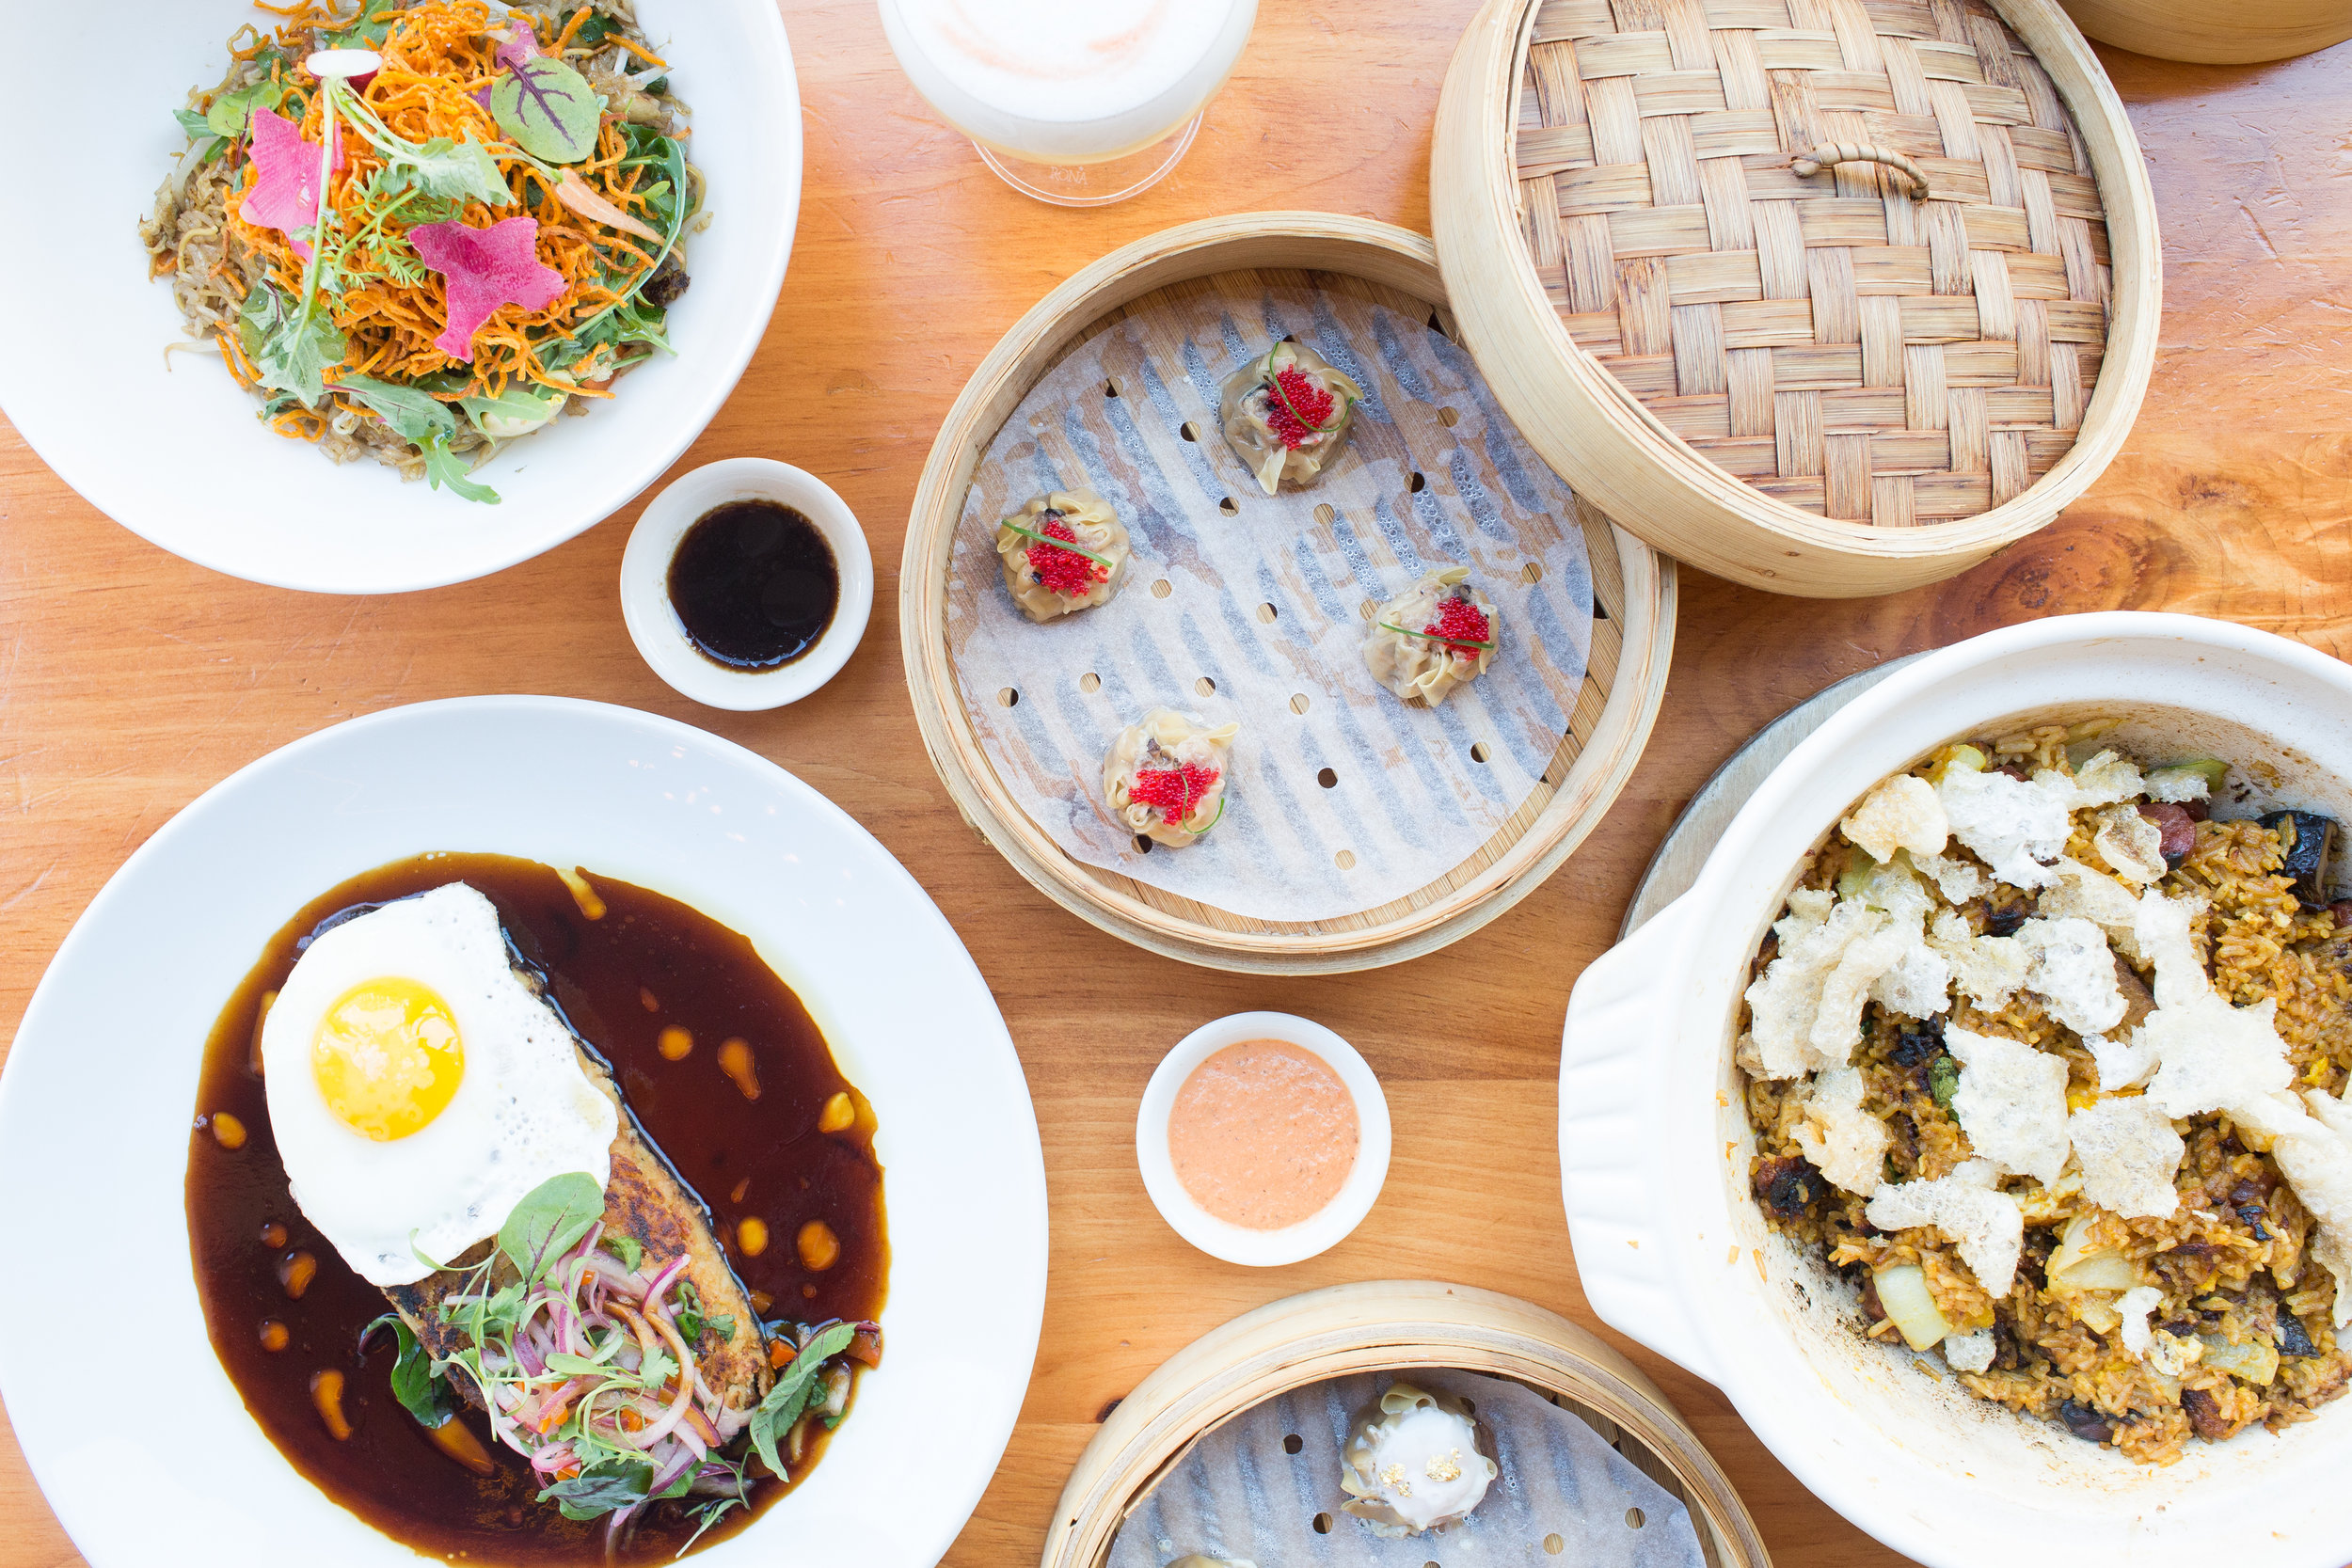
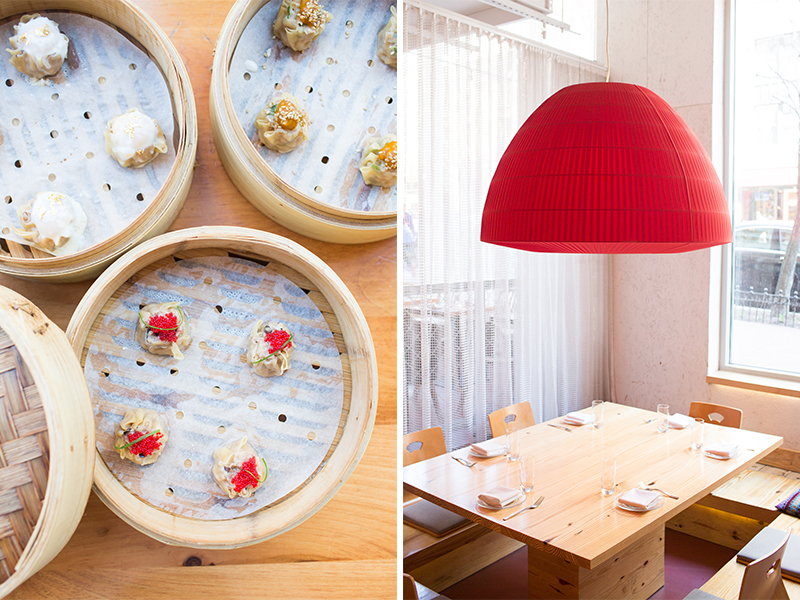
I've been fortunate enough to shoot at China Chilcano on a few occasions, and it's one of my favorite restaurants to work in. With José Andrés at the helm, the restaurant pays homage to Peru's rich and diverse culture and cuisine, and executes it beautifully.


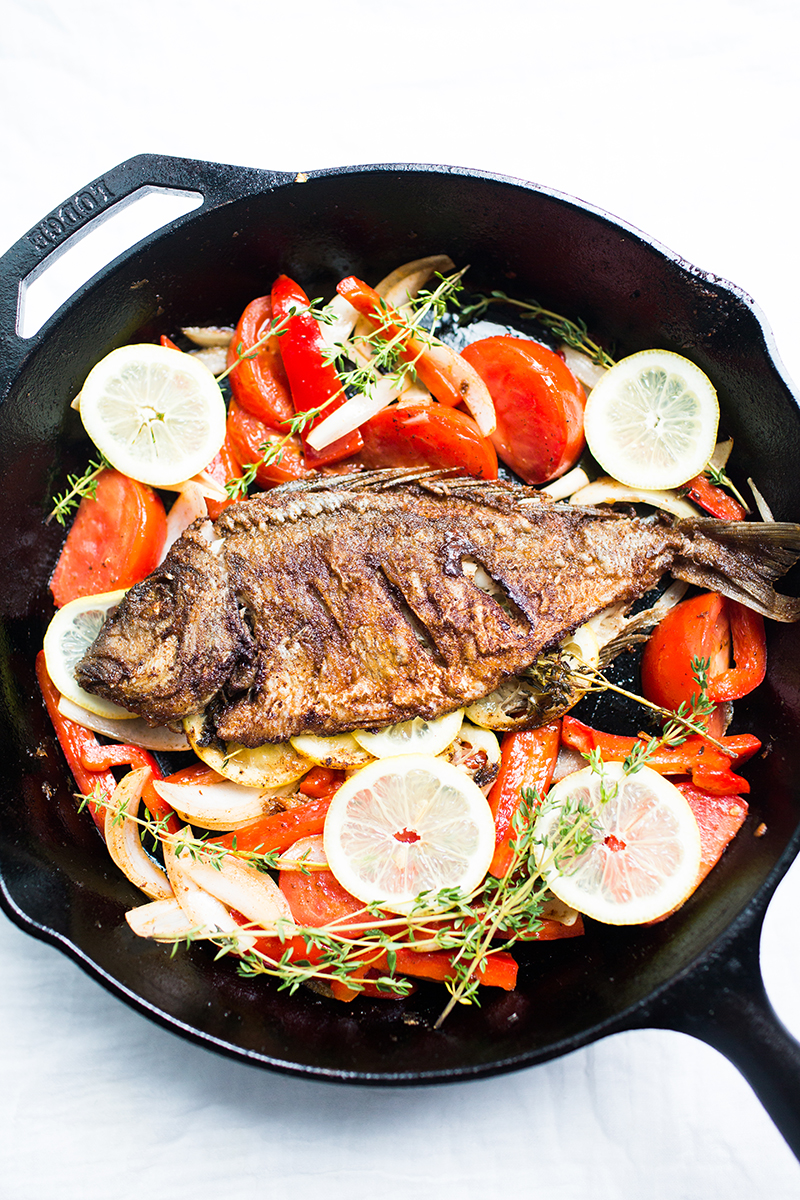
Caribbean Style Grilled Fish
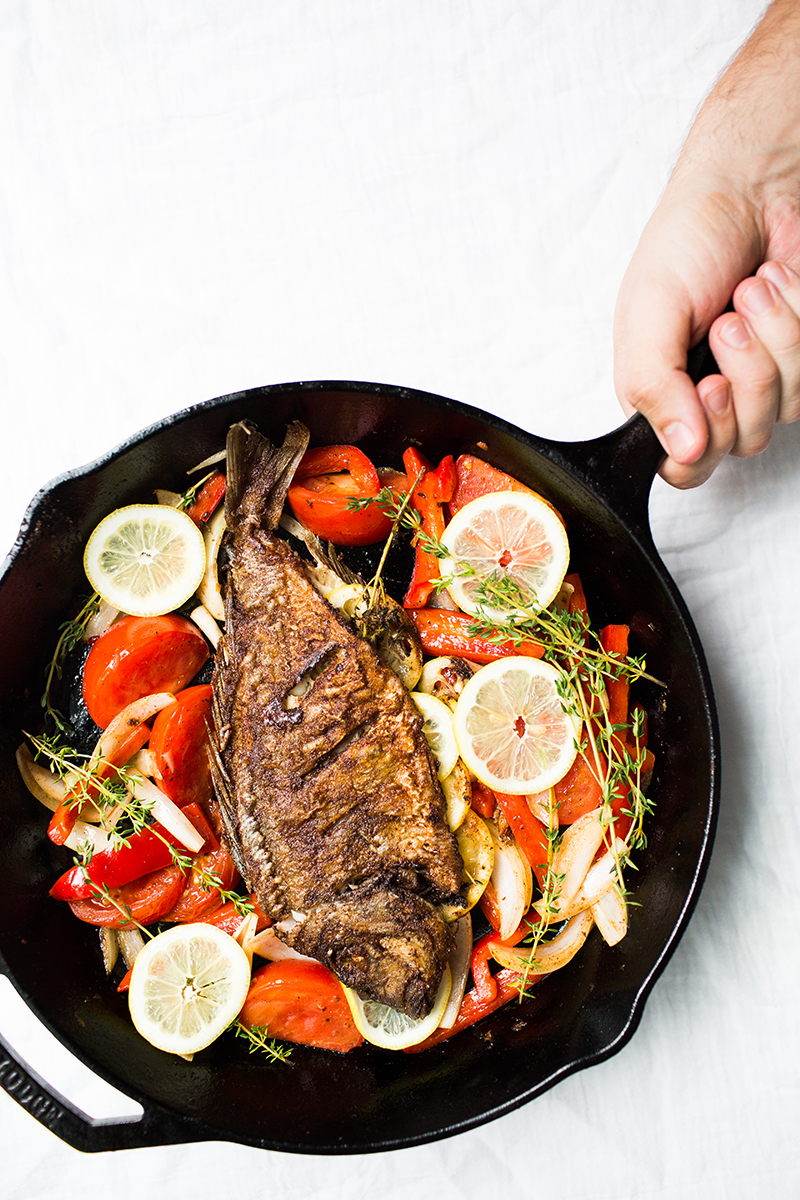
Firstly, I’ve got to admit that cooking a whole fish can be a daunting task for even a skilled home cook. Will there be more prep? Will it be flavorful enough? What about the bones? While the dish itself can look impressive, preparing a whole fish could not have been simpler.
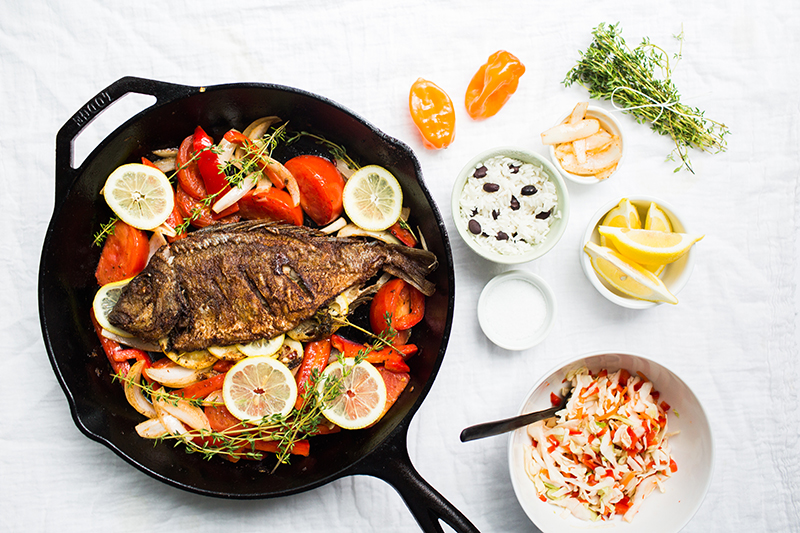
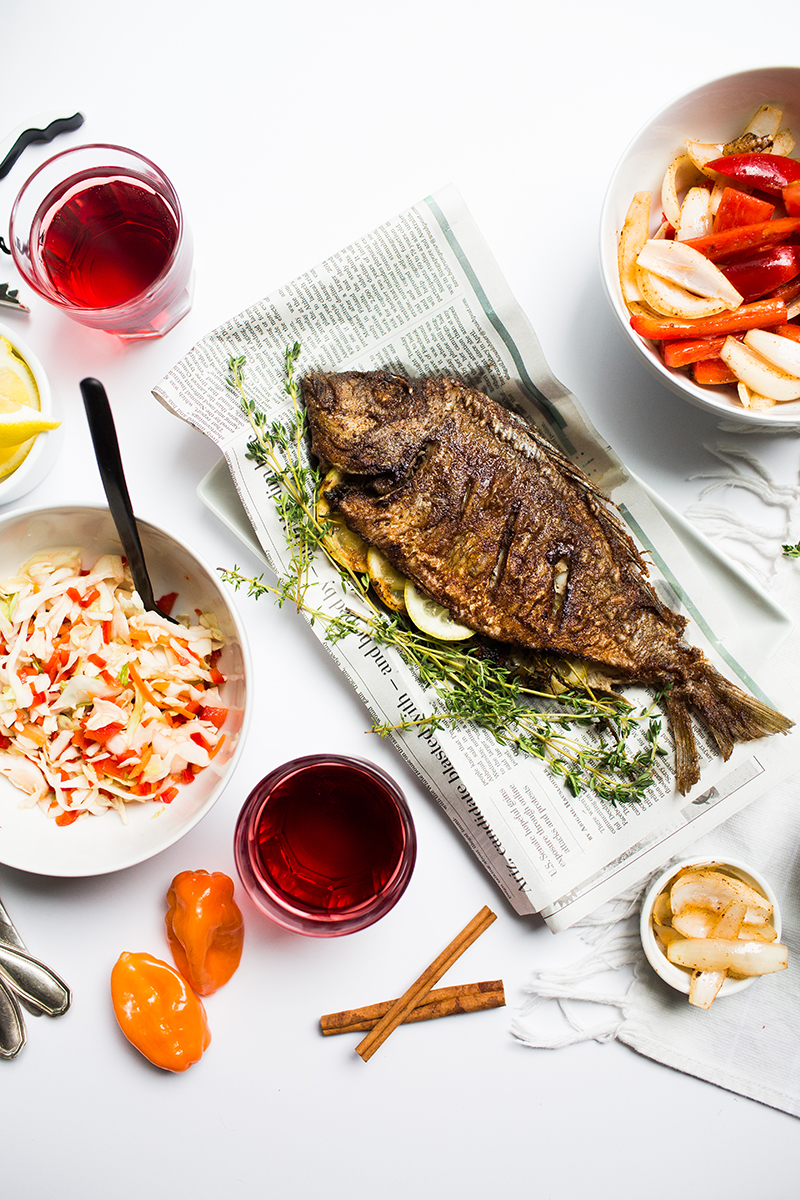
Back in St. Thomas last year on our Carnival cruise, a local food vendor came by to chat with us during our stay on Coki Beach, and when we asked about a lunch menu, he recommended the catch of the day. 20 minutes later, we were presented with a beautiful, whole fried fish, a side of rice and peas, and stewed vegetables. One of my fondest memories from the trip was eating this delicious, fresh fish right on the beach, and thought it was time to replicate it.
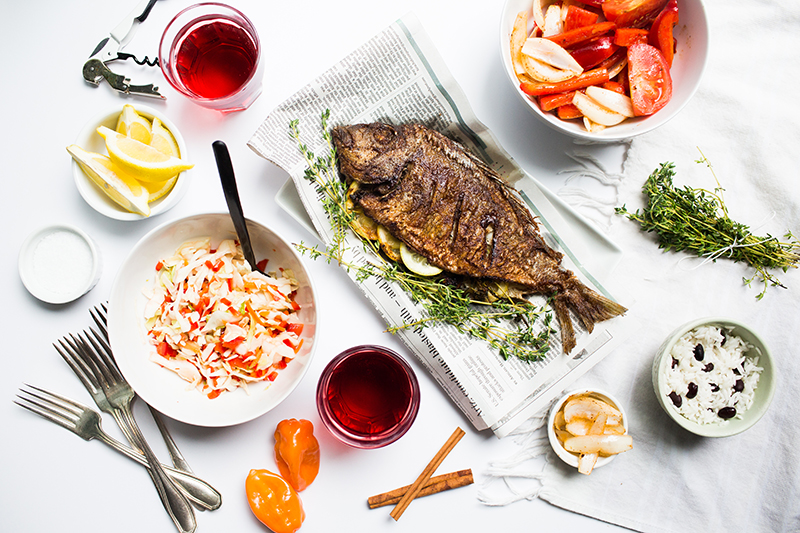
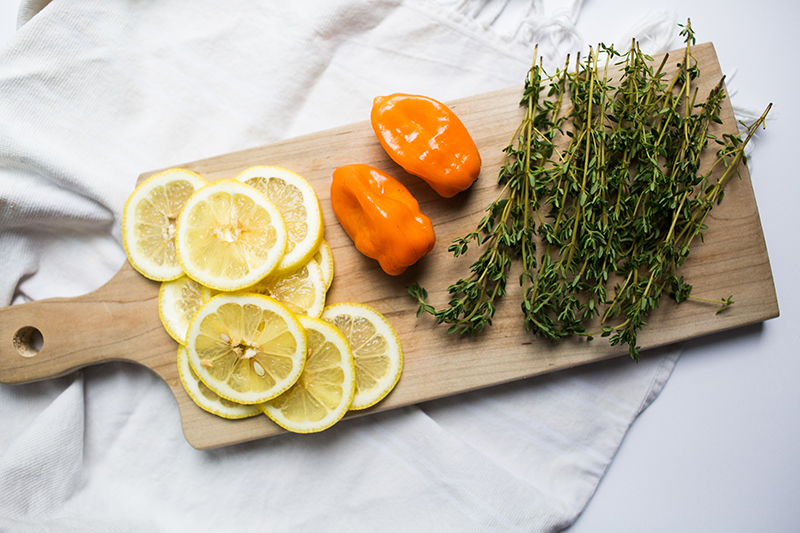
We’ve seasoned the fish with several of the spices that make up jerk seasoning (cumin, cinnamon, etc.), but you could easily purchase a jerk seasoning mix if you want to make the process even more streamlined! We decided to serve our fish with veggies, rice and coleslaw but you can easily change that up depending on what you have on hand.
Ingredients (for fish):
- 2-3 lbs of any whole fish (tilapia, porgy, snapper, etc.)
- 2 tsp ground allspice
- 1/4 tsp ground cinnamon
- 1/8 cup brown sugar
- 1/2 tsp ground cumin
- 1/2 tsp ground ginger (or 1 inch piece freshly grated ginger)
- 1/2 habanero pepper, seeds removed (optional)
- 2 cloves of garlic
- 1/2 tsp black pepper
- 1 tsp salt
- vegetable oil
- 1/4 cup flour
- 1 lemon, sliced
- fresh thyme
- 1 large tomato
- 1 red bell pepper
- 1 medium onion
Ingredients (for coleslaw):
- 1⁄2 of a small cabbage, sliced thinly
- 1 carrot, sliced
- 1⁄2 of a mango or 1⁄4 of a pineapple, thinly sliced (optional)
- 1⁄2 of a red bell pepper, thinly sliced
- 1⁄2 habanero pepper, seeds removed (optional)
- 1 tbsp apple cider vinegar
- 1 tbsp honey
- 1 tsp salt
- 1⁄2 tsp crushed red pepper flakes
Directions for fish:
- Heat a large cast iron pan over medium heat, add oil to the pan until it is about 1⁄2 inch deep (oil should be about 350 degrees). Note: you won’t fully submerge the fish in oil. Instead, it will be flipped halfway through cooking.
- Rinse the fish under cold water, make sure to remove any remaining scales. Split the fish down the middle to create a cavity between the filets.
- Mix together the allspice, cinnamon, sugar, cumin, ginger, habanero pepper, garlic, black pepper, salt, and vegetable oil into a food processor and blend to combine.
- Use a brush to thoroughly coat the entire fish with the blended spice mixture inside and out.
- Place the flour on a plate and coat the outside of the fish in the flour.
- Stuff the inside of the fish with 5-6 lemon slices and a healthy portion of fresh thyme.
- Place the fish into the oil and cook on one side for roughly 7-10 minutes, or until golden brown.
- Flip the fish and continue cooking for an additional 7-10 minutes on the other side.
- Remove the fish from the pan and set onto paper towels to dry.
- Add the chopped tomatoes, red pepper and onions and saute for 2-3 minutes, just enough to get them to pick up the leftover spices from the pan.
- Serve the fish surrounded by the cooked vegetables, squeeze lemon over top if desired.

Directions for coleslaw:
- Combine the cabbage, carrot, mango, red bell pepper and habanero pepper (optional) into a large bowl.
- Whisk together the honey, vinegar, and salt and pour the mixture over the vegetables.
- Cover bowl and marinate for at least one hour in the refrigerator.
![]()
This post was created for Away We Go with Carnival, the destination for getting in the getaway state of mind. Head on over.

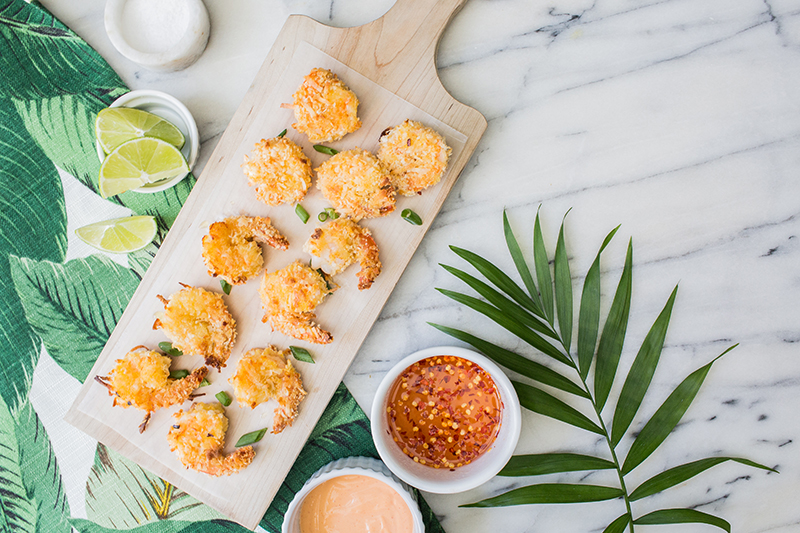
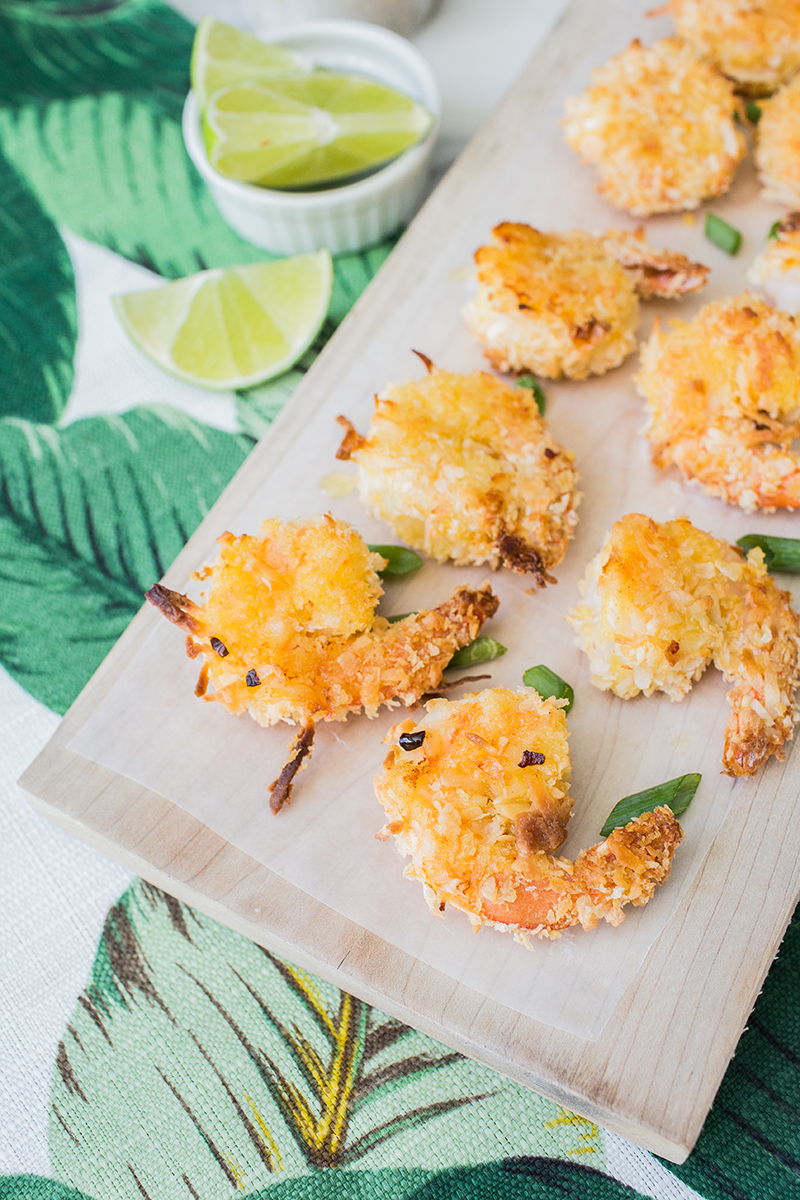
AN EASY COCONUT SHRIMP RECIPE
For me, there are few other dishes that evoke the feeling of summer, dining al fresco, and a lazy vacation day quite like coconut shrimp. Back when we sailed on the Carnival Breeze last year, we ate tons of amazing seafood and all the shrimp we possibly could, but the coconut shrimp at RedFrog Pub was a favorite. When we returned back from our trip, I figured it was time that I learned to make the dish at home.
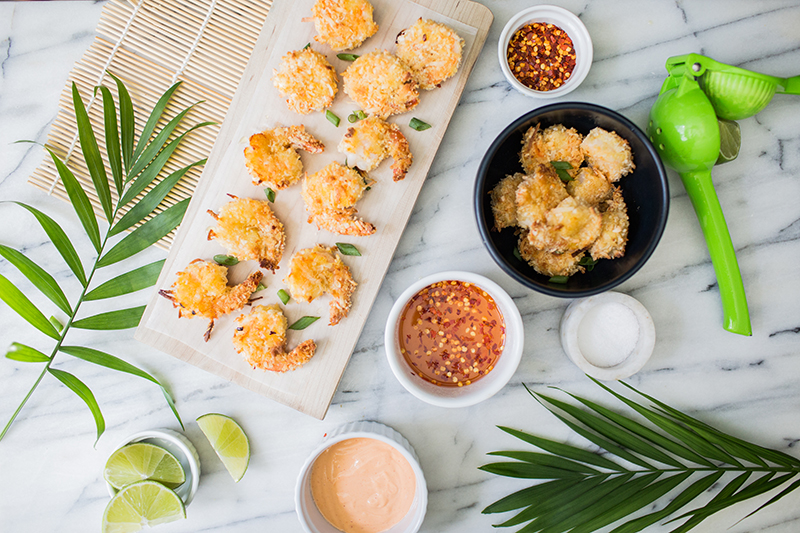
Though it’s one of my favorite ways to prepare and eat shrimp, coconut shrimp can be a bit unhealthy in its traditional fried form. Here, I’ve opted to bake the shrimp instead. You get the same great crunch and coconut flavor, but it’s a lot healthier and in my opinion, a lot easier to cook as well!
I’ve found that this is a great dish to serve as an appetizer while entertaining. It ends up looking a lot more impressive and difficult than it actually is (preparing it really could not be easier), and it’s been a crowd pleaser every time I’ve made it for guests. I like to prep it with two different sauces: a tangier one and a creamier one, but you could experiment with other flavors and sauces to your liking. It’s a really versatile dish so the options are pretty limitless!

Baked Coconut Shrimp Recipe:
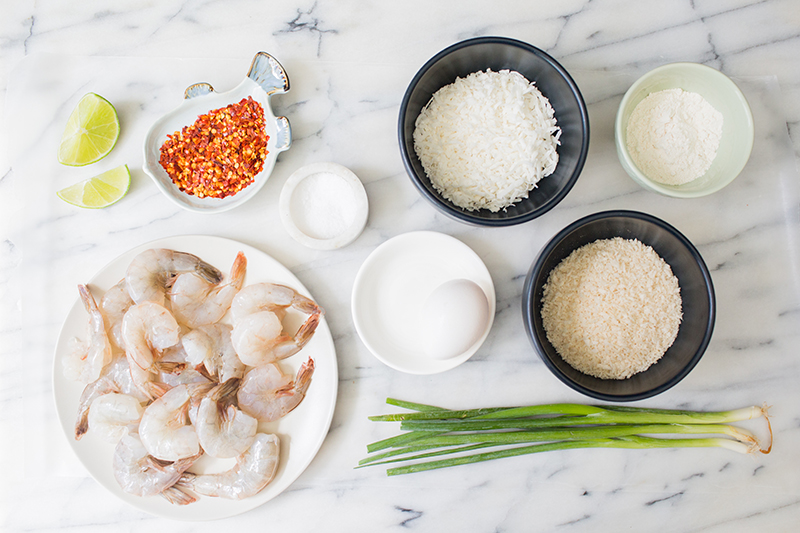
Ingredients (for shrimp):
- 1 lb large raw shrimp, peeled and deveined
- 1/2 cup shredded sweetened coconut flakes
- 1/2 cup panko bread crumbs
- 1⁄2 tsp powdered ginger
- 1⁄2 tsp garlic powder
- 1⁄2 tsp cayenne pepper
- 1 large egg
- 1 tsp salt (or to taste)
- 1 tbsp all purpose flour
- Olive oil
Ingredients (for tangy dipping sauce):
- 1 tbsp rice wine vinegar
- 2 tbsp marmalade (we used guava jelly but orange or lemon marmalade would work nicely too)
- 1⁄2 tsp crushed red pepper flakes
Ingredients (for creamy Sriracha mayo sauce):
- 1⁄4 cup mayonnaise
- 1 tbsp Sriracha (you could add more if you want the sauce to be spicier)
- Juice from 1⁄4 lime
Directions for shrimp:
1. Preheat the oven to 425 degrees. 2. Rinse and devein the shrimp, and lightly salt after deveining. You can remove the tails at this point if you prefer. 3. Combine coconut flakes, panko bread crumbs, powdered ginger, garlic powder, cayenne pepper and remaining salt in a bowl. 4. Whisk egg into the second bowl. 5. Place flour into separate bowl. 6. Spray or spread olive oil onto a baking pan. This is where you’ll be placing your full coated shrimp.

7. Start the battering process by dipping the shrimp into the flour to coat it evenly. Then, drop the floured shrimp into the egg; dip one last time into the panko and coconut flake mixture. Lay the breaded shrimp out onto your baking pan.
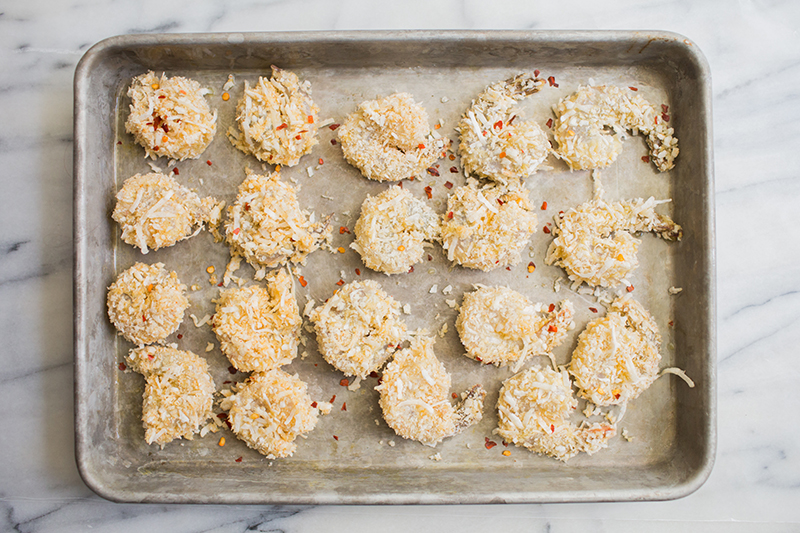
8. Once all of your shrimp are breaded, place them into the oven, and bake for about 8-10 minutes, or until the tops start to turn golden brown. 9. Turn the shrimp over after they’ve cooked 8-10 minutes. Place them back into the oven for 6-8 minutes or until browned and cooked thoroughly. 10. Combine your ingredients for sauces, and serve the shrimp immediately with lime wedges.
Directions for tangy dipping sauce:
1. Combine rice wine vinegar, marmalade of your choice and red pepper flakes in a small bowl and stir.
Directions for Sriracha mayo sauce:
1. Combine mayonnaise, Sriracha and lime juice in a small bowl and stir.

![]()
This post was created for Away We Go with Carnival, the destination for getting in the getaway state of mind. Head on over.

A Summer Grill Out
This post was sponsored by Bota Box. All opinions and thoughts expressed are my own.
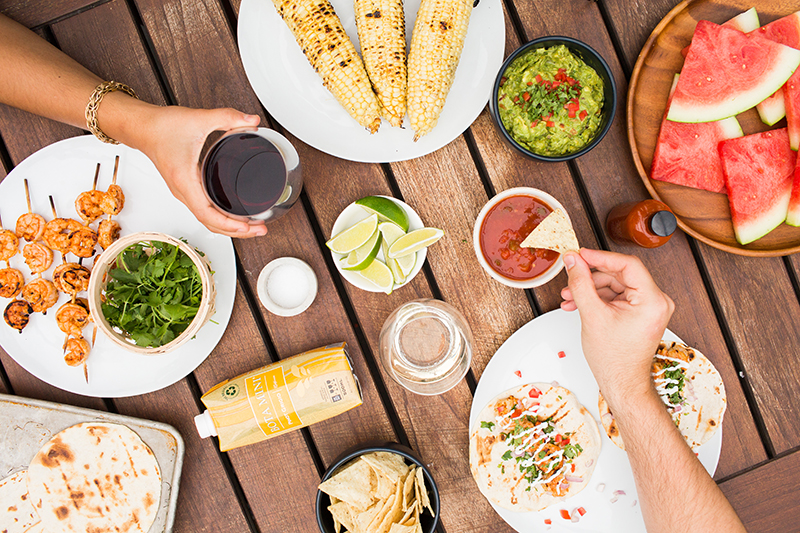
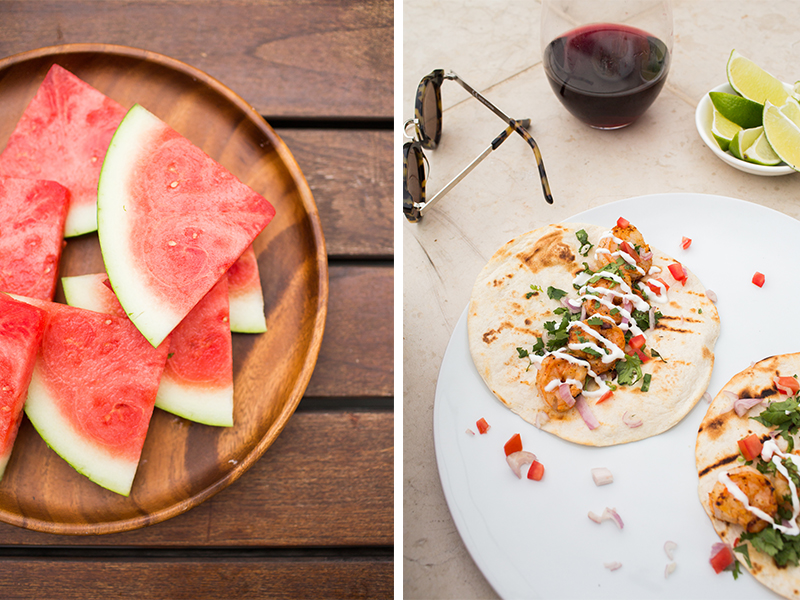
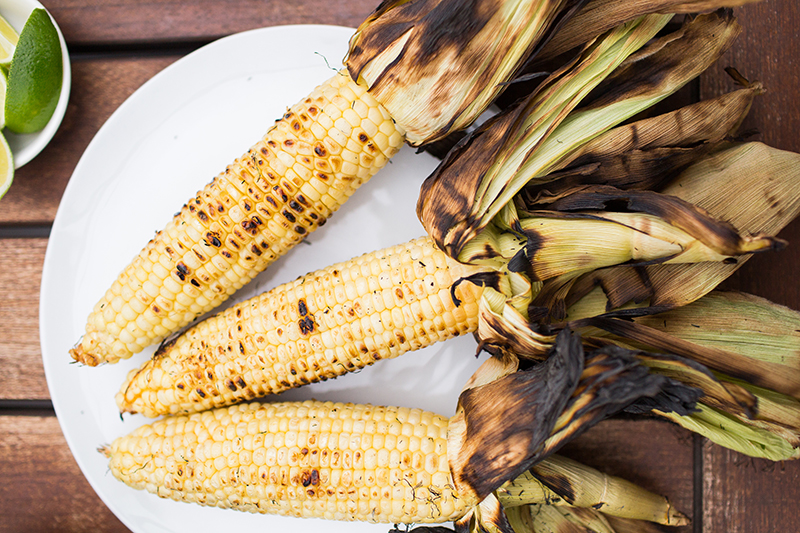
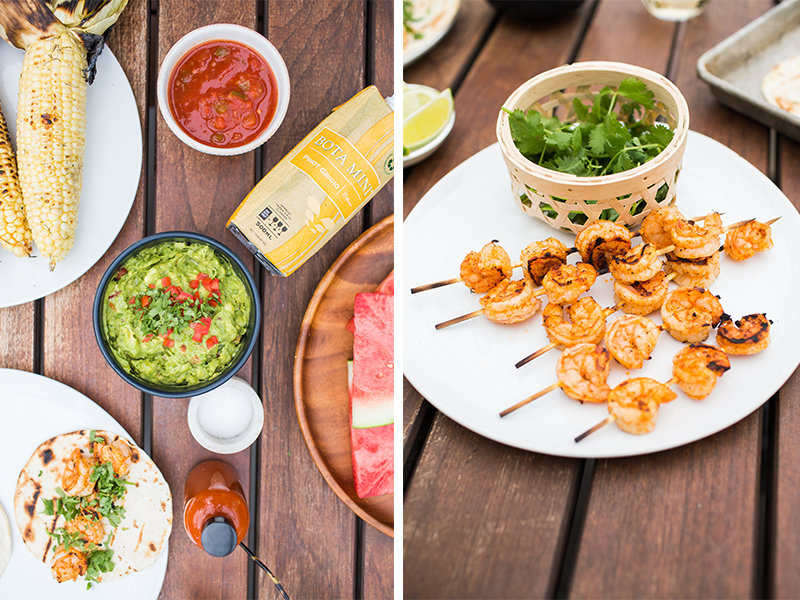
During the summer months, we try to spend at least a few nights a week up on our building's rooftop grilling dinner. We have a few go-tos in the rotation (bbq chicken, grilled veggies, flank steaks, etc.) but grilled shrimp is always at the top of my list. This time, we opted to have a couple of friends over, and change things up with grilled shrimp tacos instead. They are SO ridiculously easy to make, they're fast, and they're perfect to have on a hot summer night. Through my partnership with Bota Box, we poured some wine to go along with, and had the perfect evening.
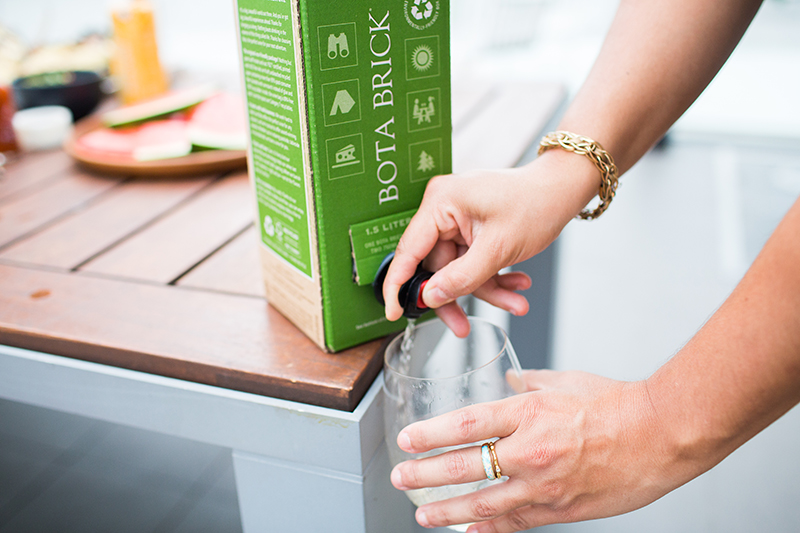
I hadn't tried Bota Box before, but was really excited to find that the packaging is 100% recyclable, and creates 85% less landfill waste than traditional glass bottles. We've really been trying to reduce our carbon footprint, and use recyclable packaging and materials as much as possible so it's definitely a big selling point on that end. Best of all, the wine was delicious (the pinot noir is a personal favorite, but the pinot grigio went perfectly with the tacos). I've included the taco recipe below and you can visit www.botabox.com if you're curious about where to find a box near you!
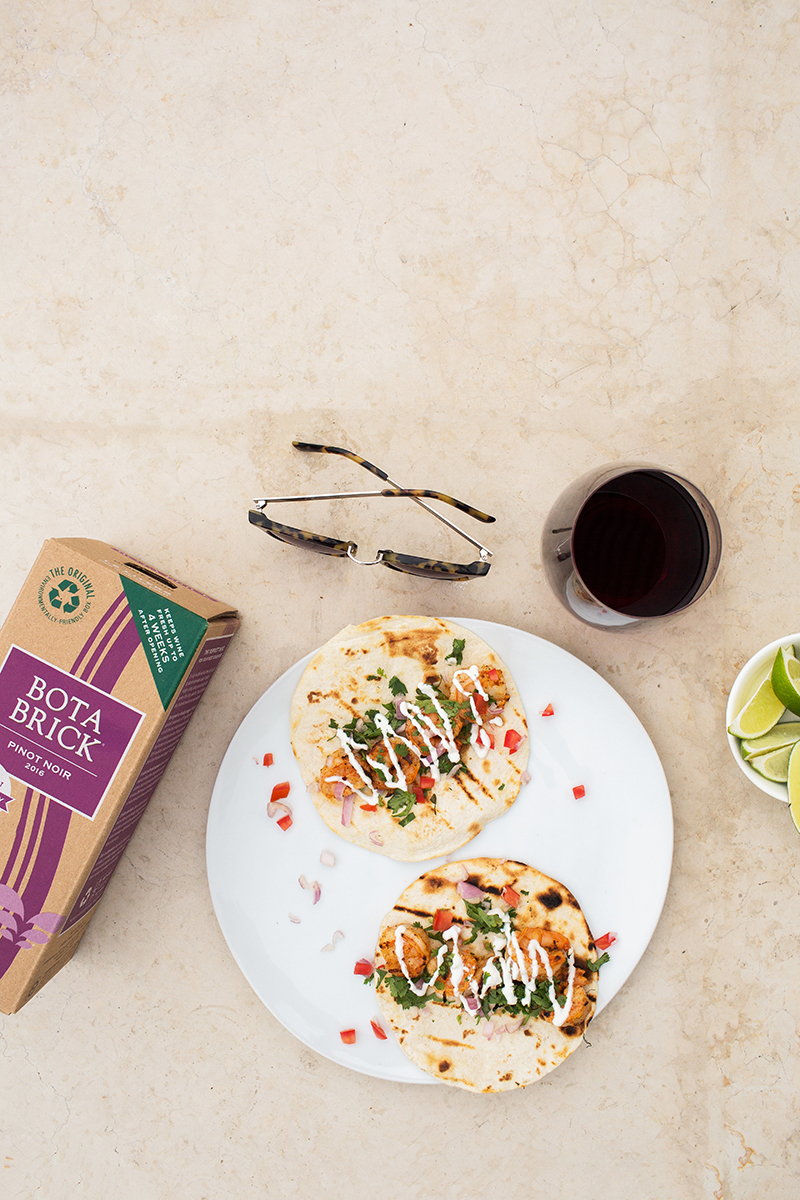

GRILLED SHRIMP TACOS
Ingredients:
- 1 lb. jumbo raw shrimp
- ½ tsp garlic powder
- ½ tsp cayenne pepper
- ½ tsp cumin powder
- ½ tsp chili powder
- ½ tsp black pepper
- ½ tsp salt
- 1 tbsp vegetable oil
- 1 bunch cilantro
- Lime wedges
- 6-8 flour tortillas
Directions:
- Begin by soaking your wooden skewers in water. Soaking for at least 30 minutes allows the skewers to not burn on the grill as easily.
- Rinse, peel and devein the shrimp. Remove the tails.
- Combine the dry spices with the vegetable oil and stir to combine.
- Add the shrimp to the spice mixture and toss to coat evenly.
- Skewer 4-5 shrimp on each wooden skewer, leaving some room between each shrimp
- Fire up your grill on high to heat to roughly 400 degrees. Once grill is heated, turn burners down to medium.
- Place the shrimp skewers onto the grill. Cook for roughly 2-3 minutes on each side, or until the shrimp start to lightly char around the edges.
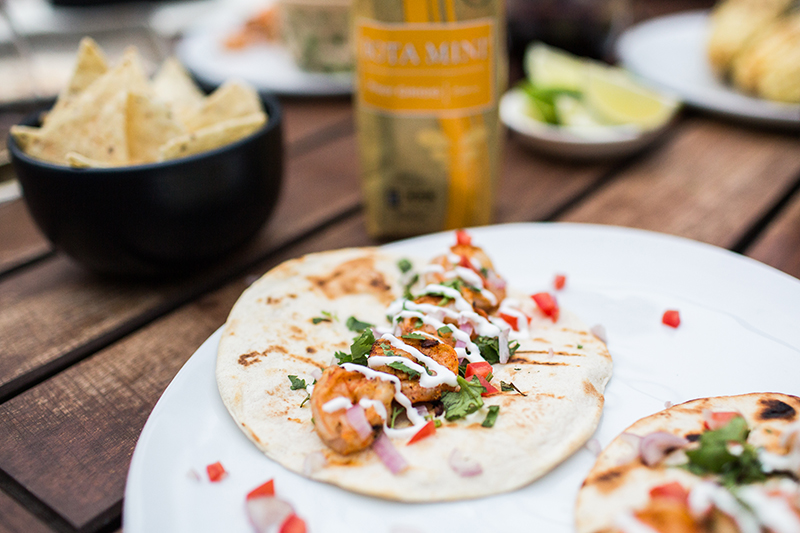
- Serve the shrimp immediately by placing 4-5 shrimp on each grilled tortilla. Top with sour cream drizzle, fresh cilantro and serve with lime wedges.
We served the tacos with chips and, guac, grilled corn and watermelon slices but extra grilled veggies, fresh salsa or grilled pineapple would work well too!
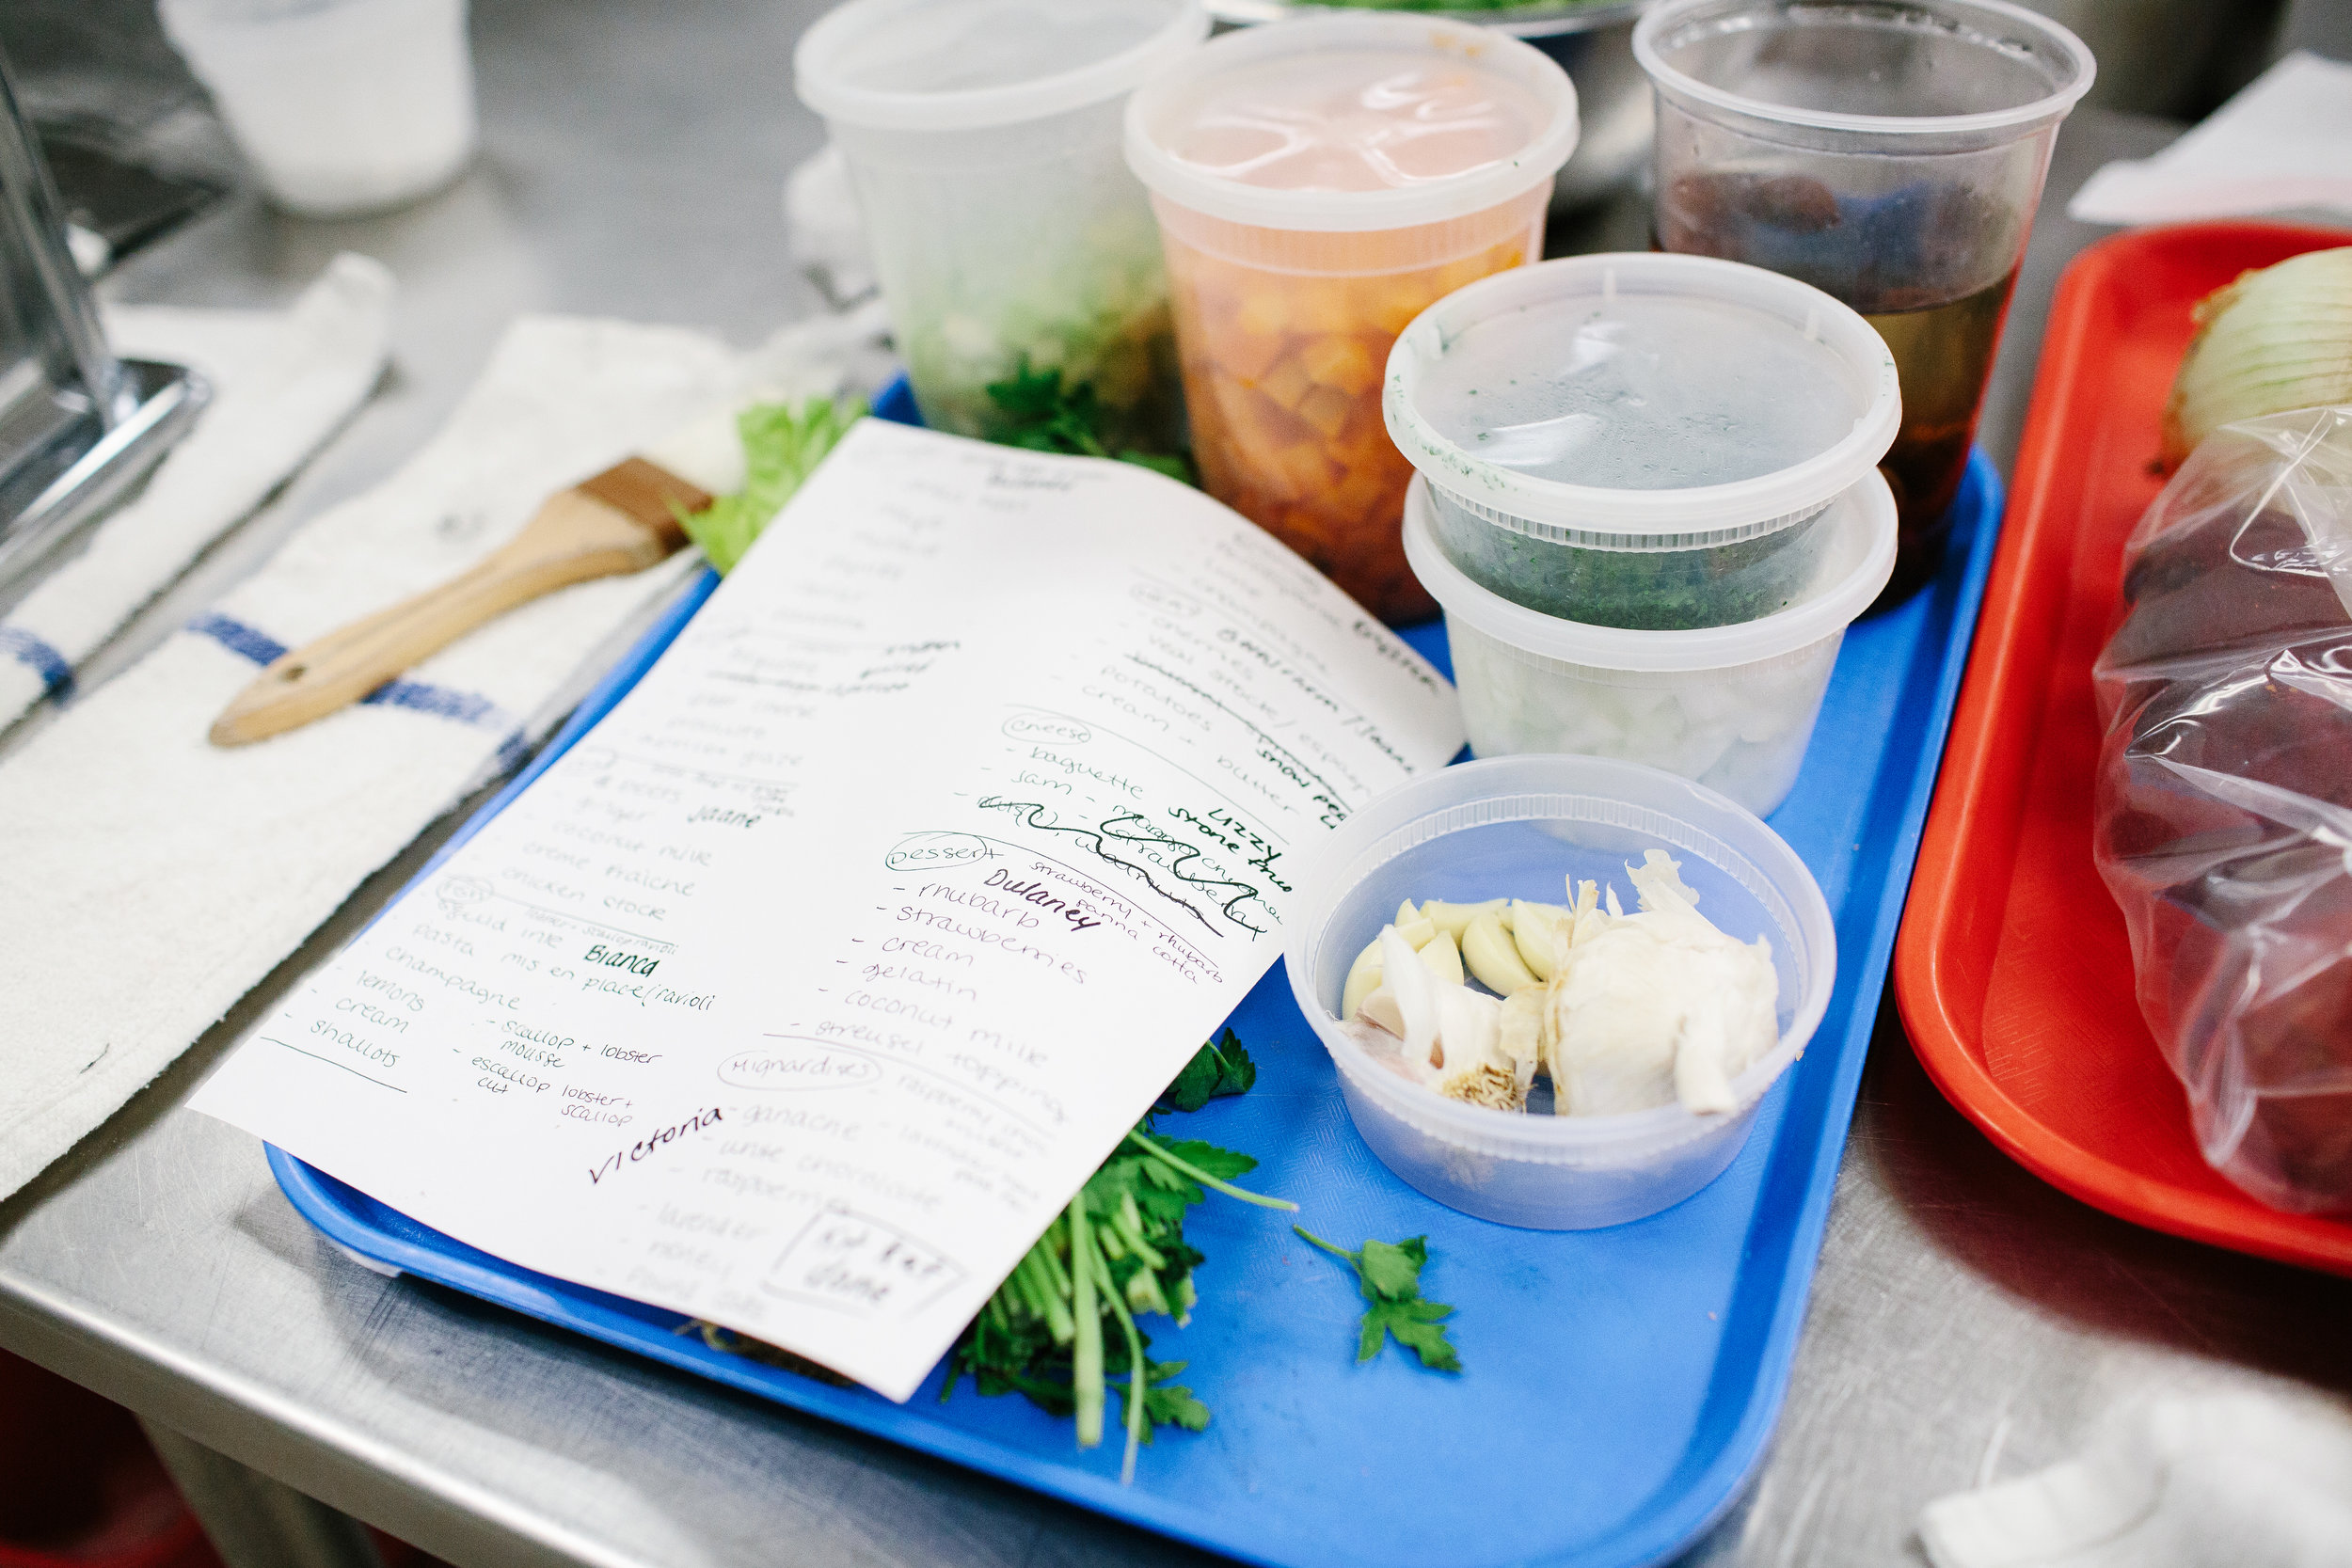
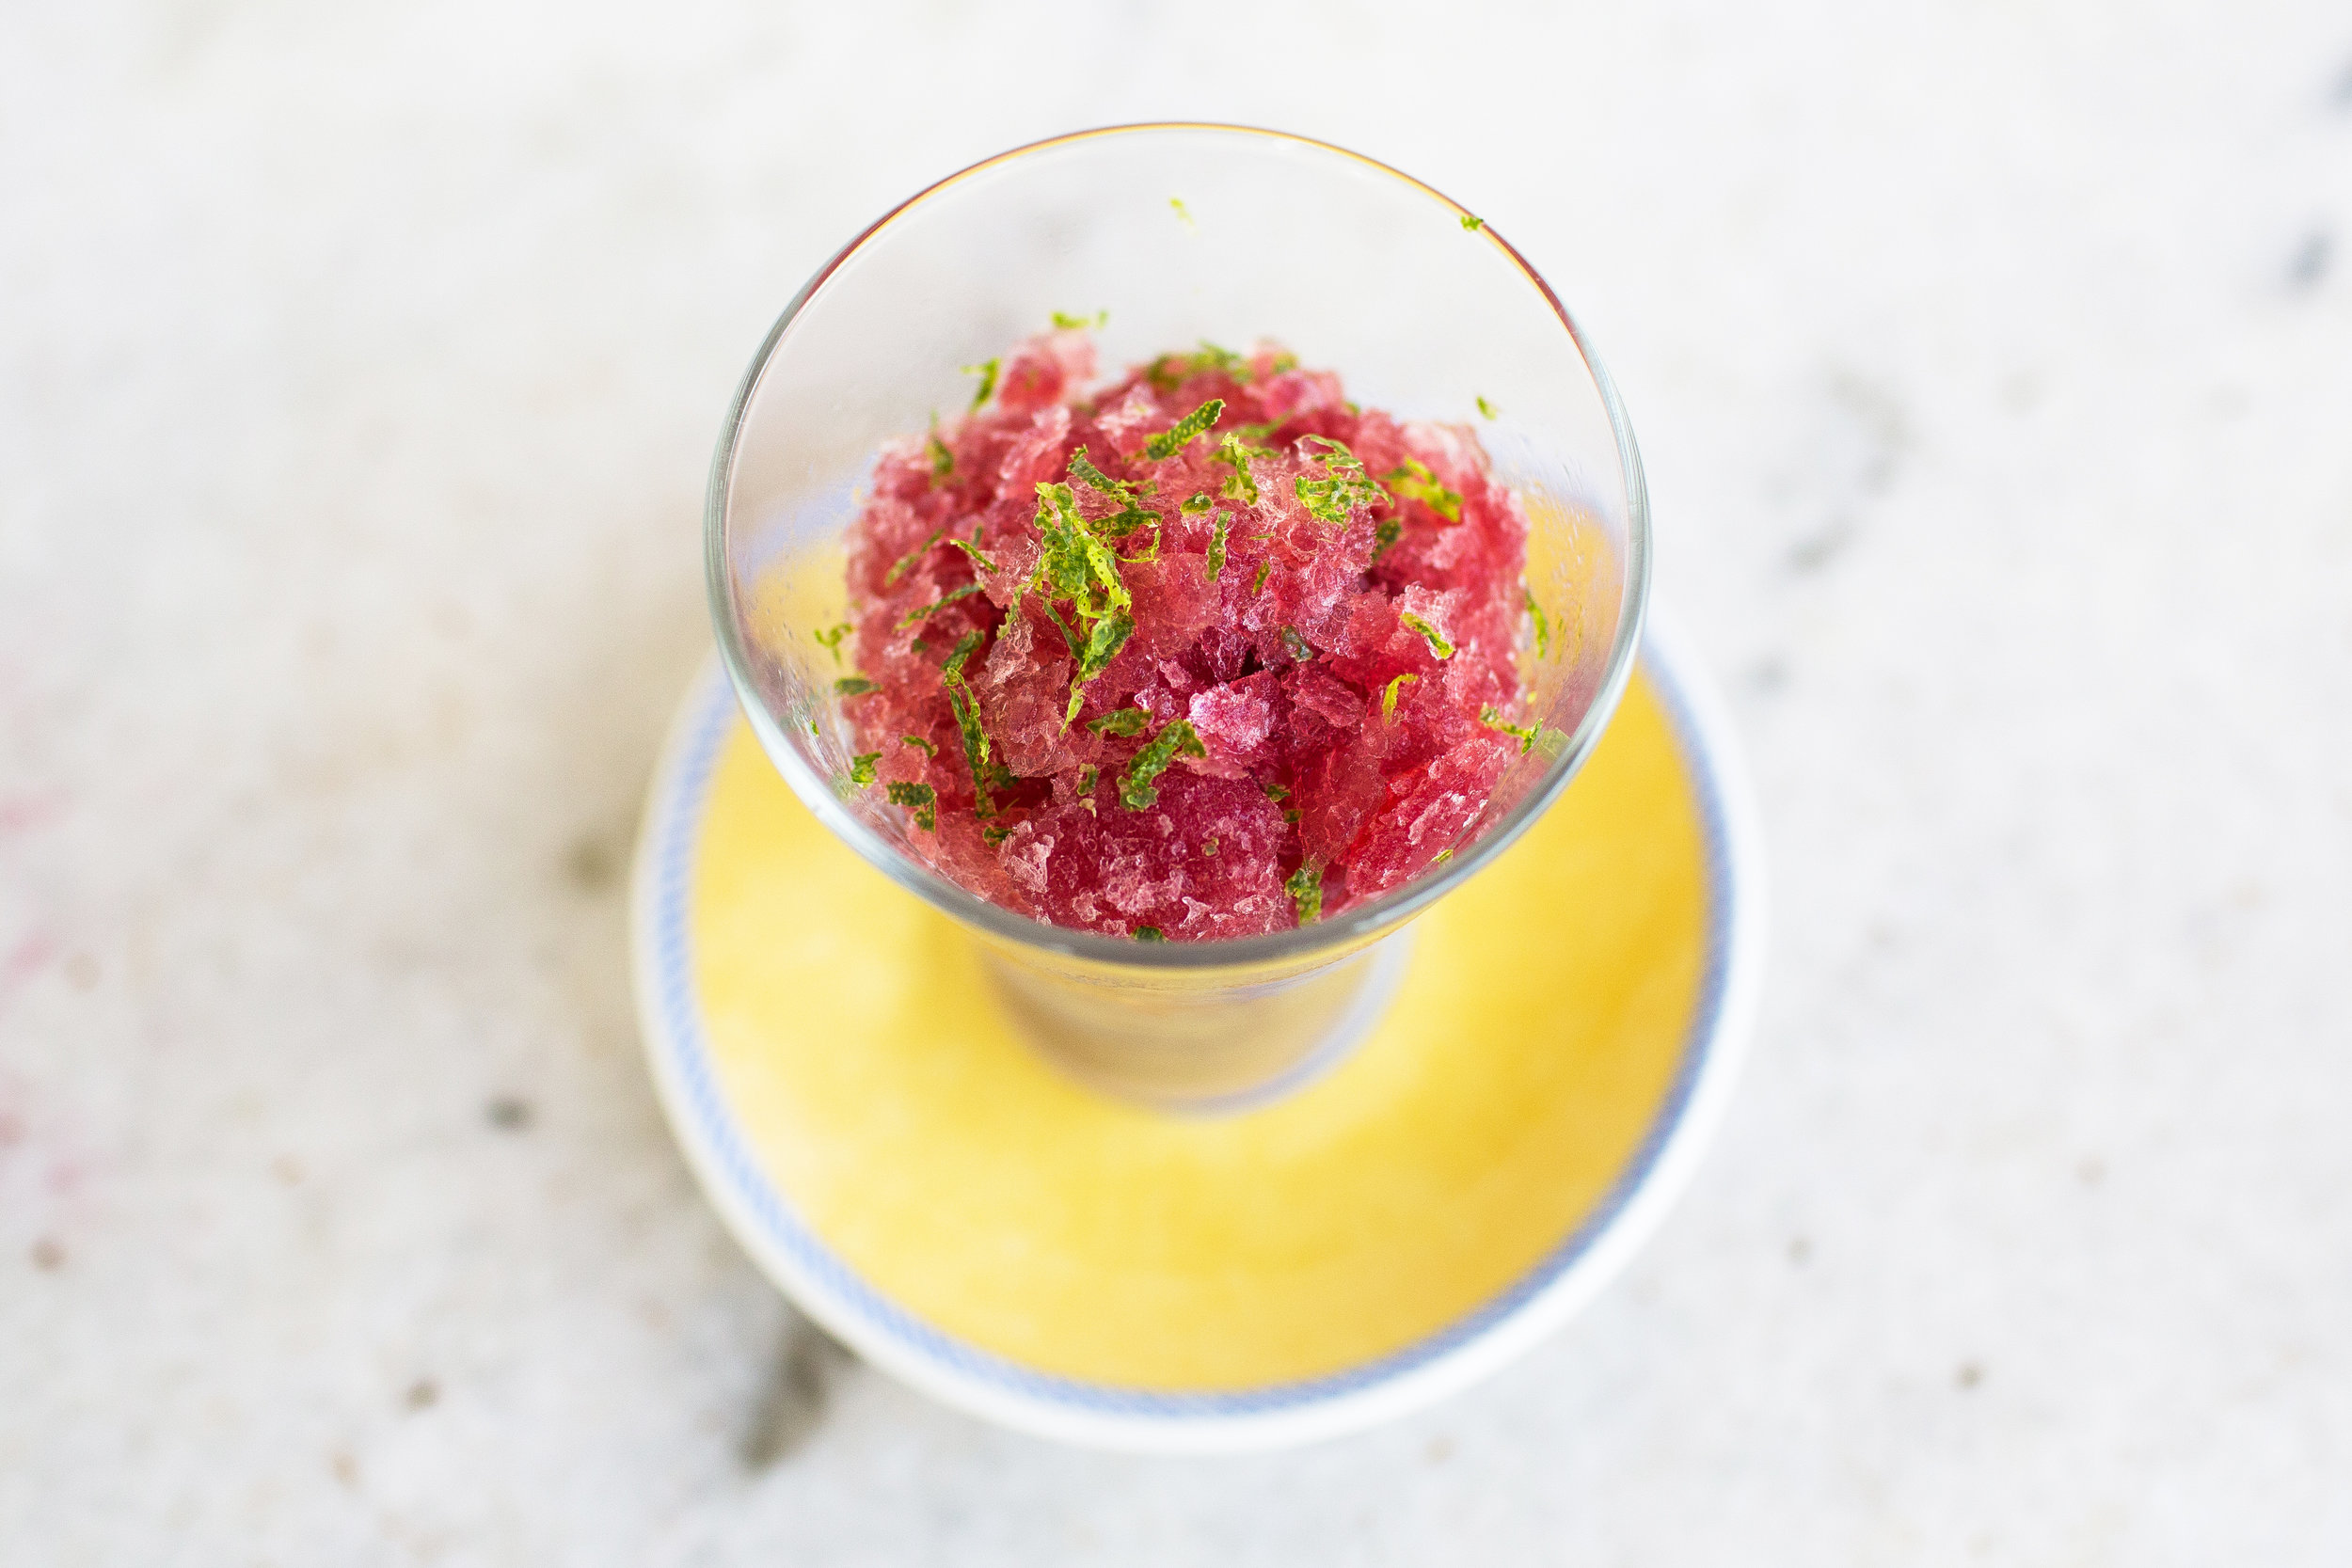
A Day at L'Academie de Cuisine
Earlier this year I spent the day at L'Academie de Cuisine, a professional culinary and pastry arts school just outside of D.C. in Maryland. The school needed new photos for their website, and invited me to spend the day at their campus shooting a few different culinary classes, pastry classes, and a cooking competition (similar to Chopped) that took place among their Phase 2 students. These students are in the advanced kitchen training portion of their education, and it was pretty incredible to watch them work their way around the kitchen.

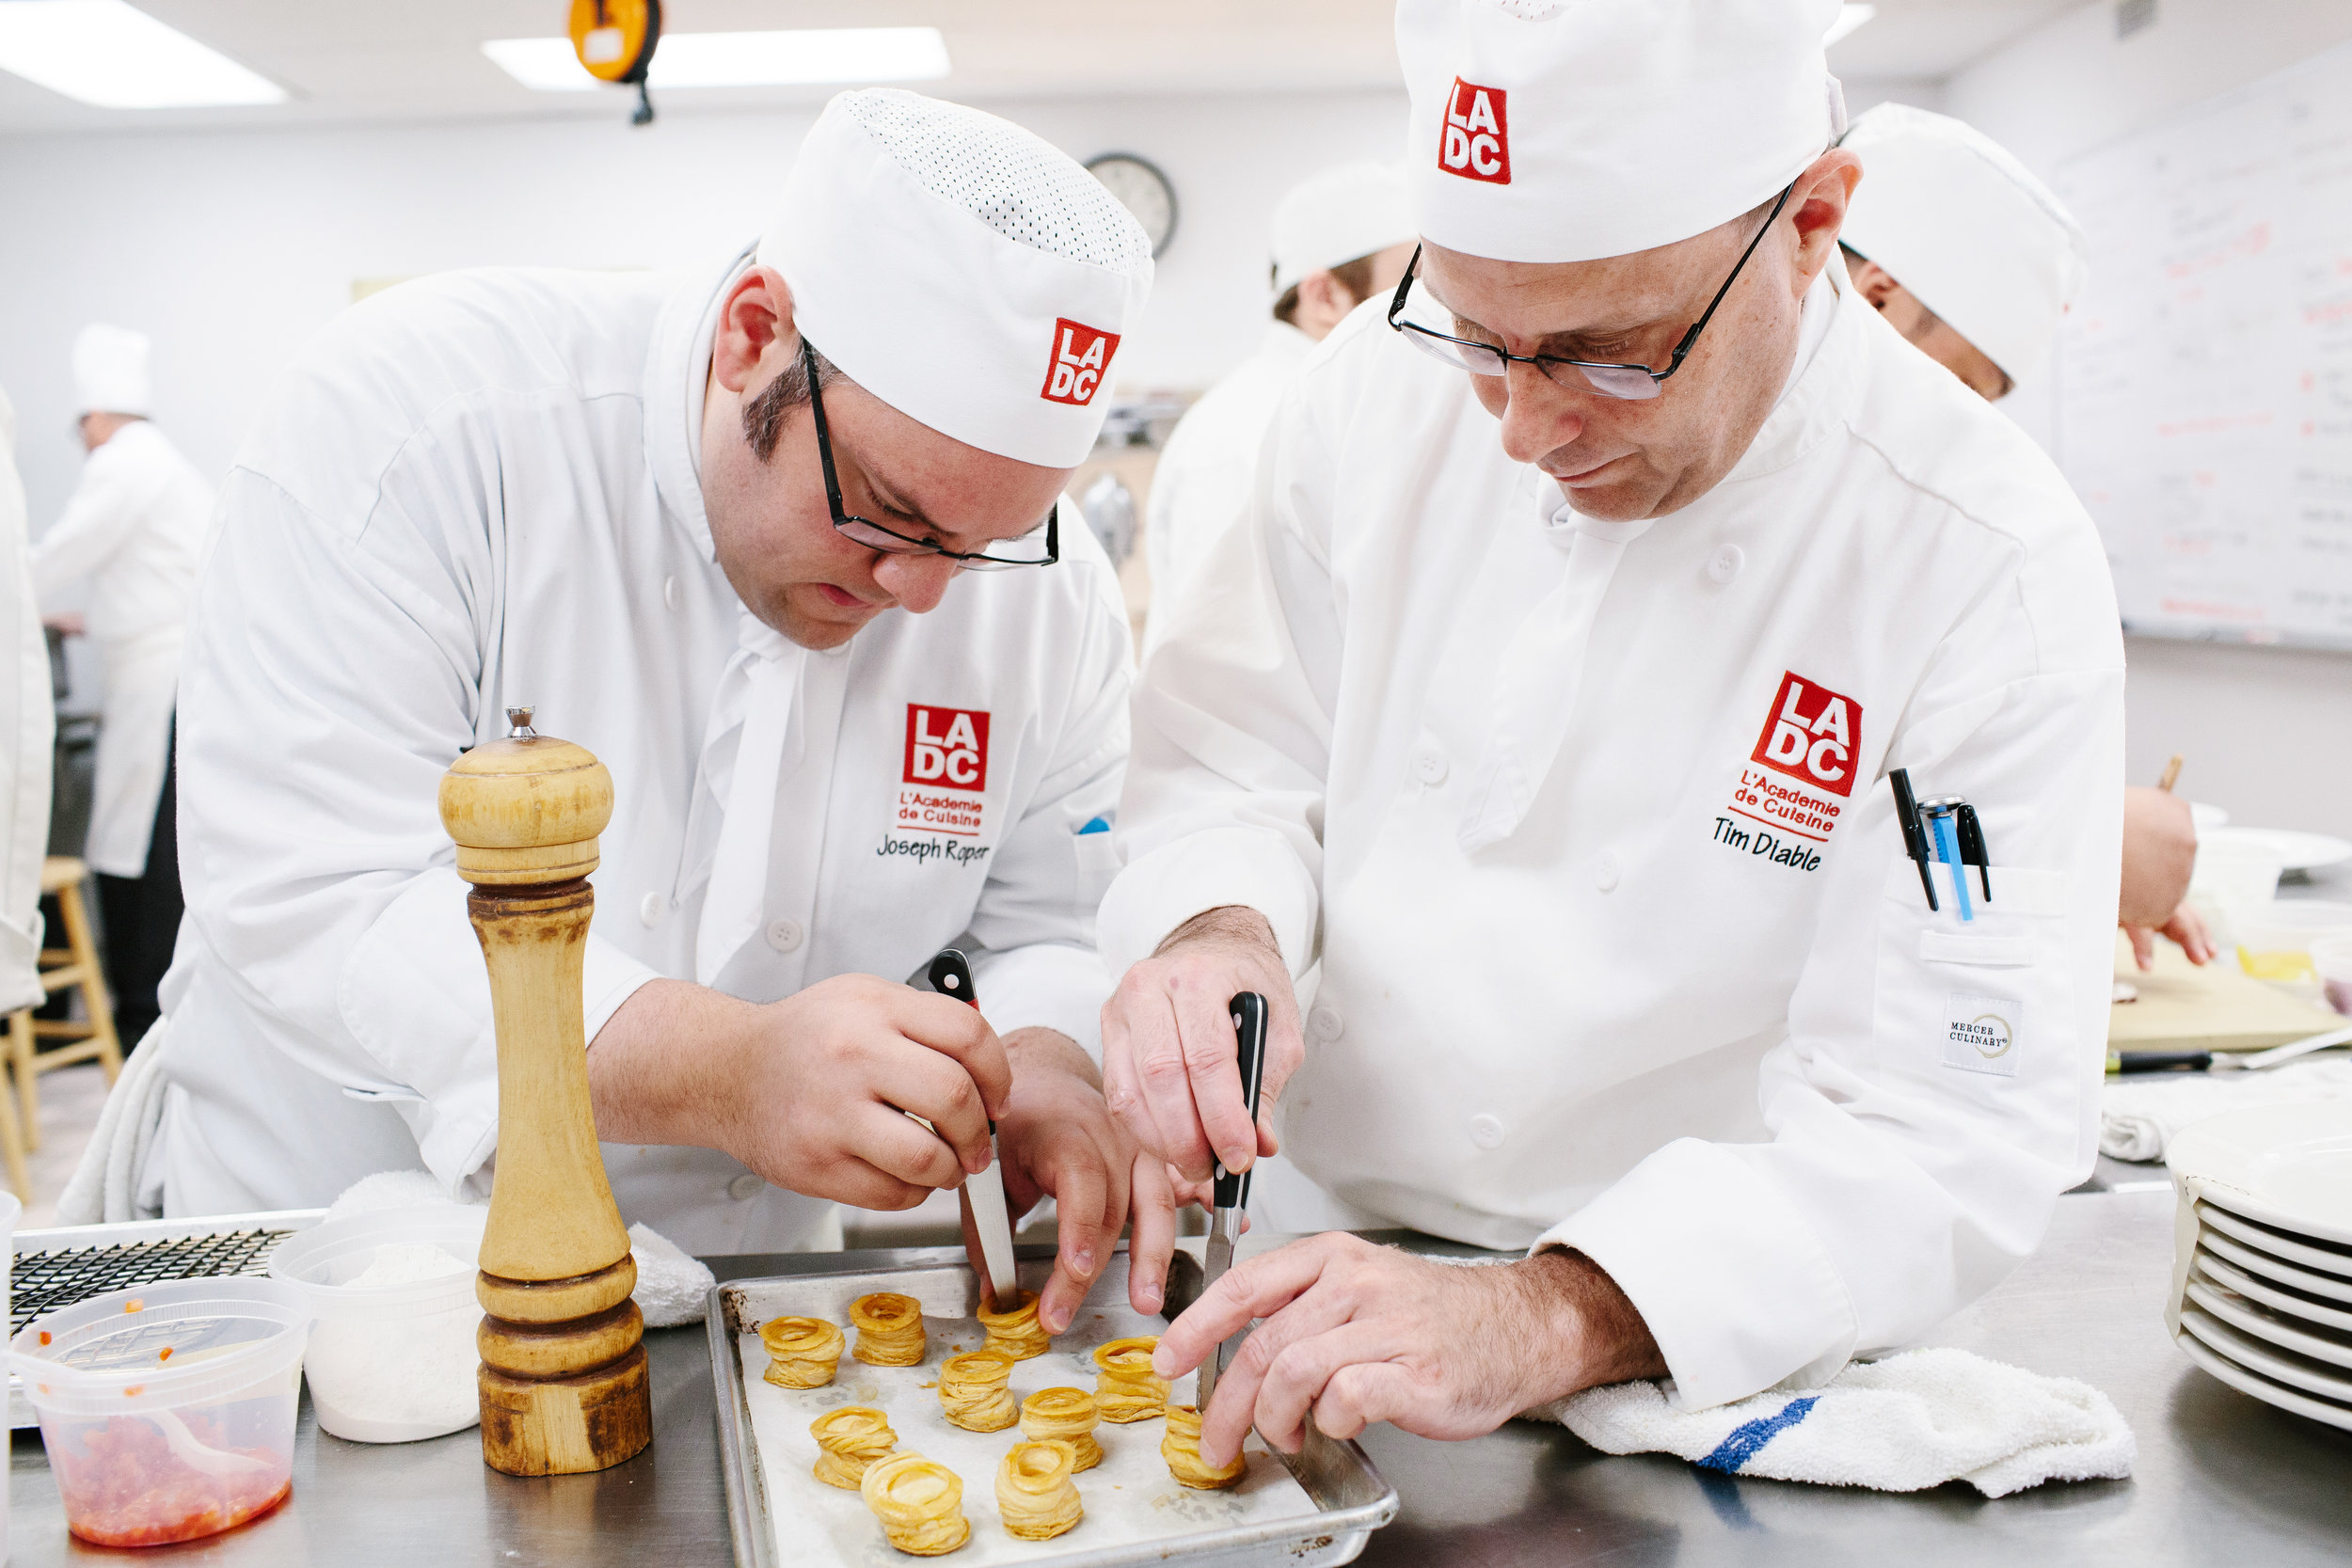
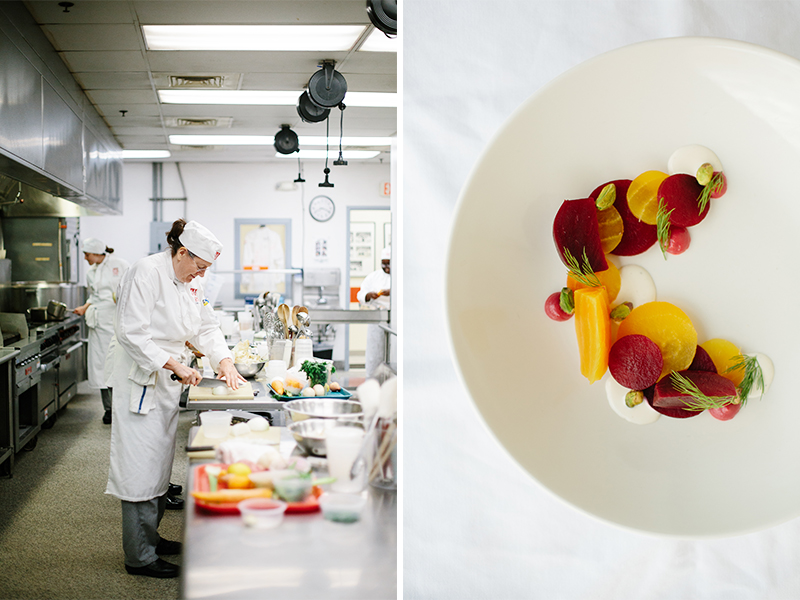

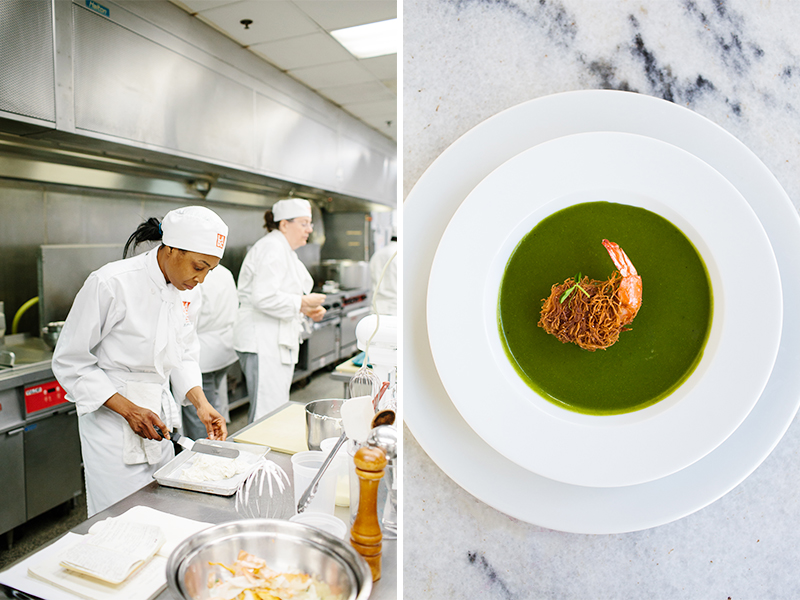


More photos are over at the L'Academie website!
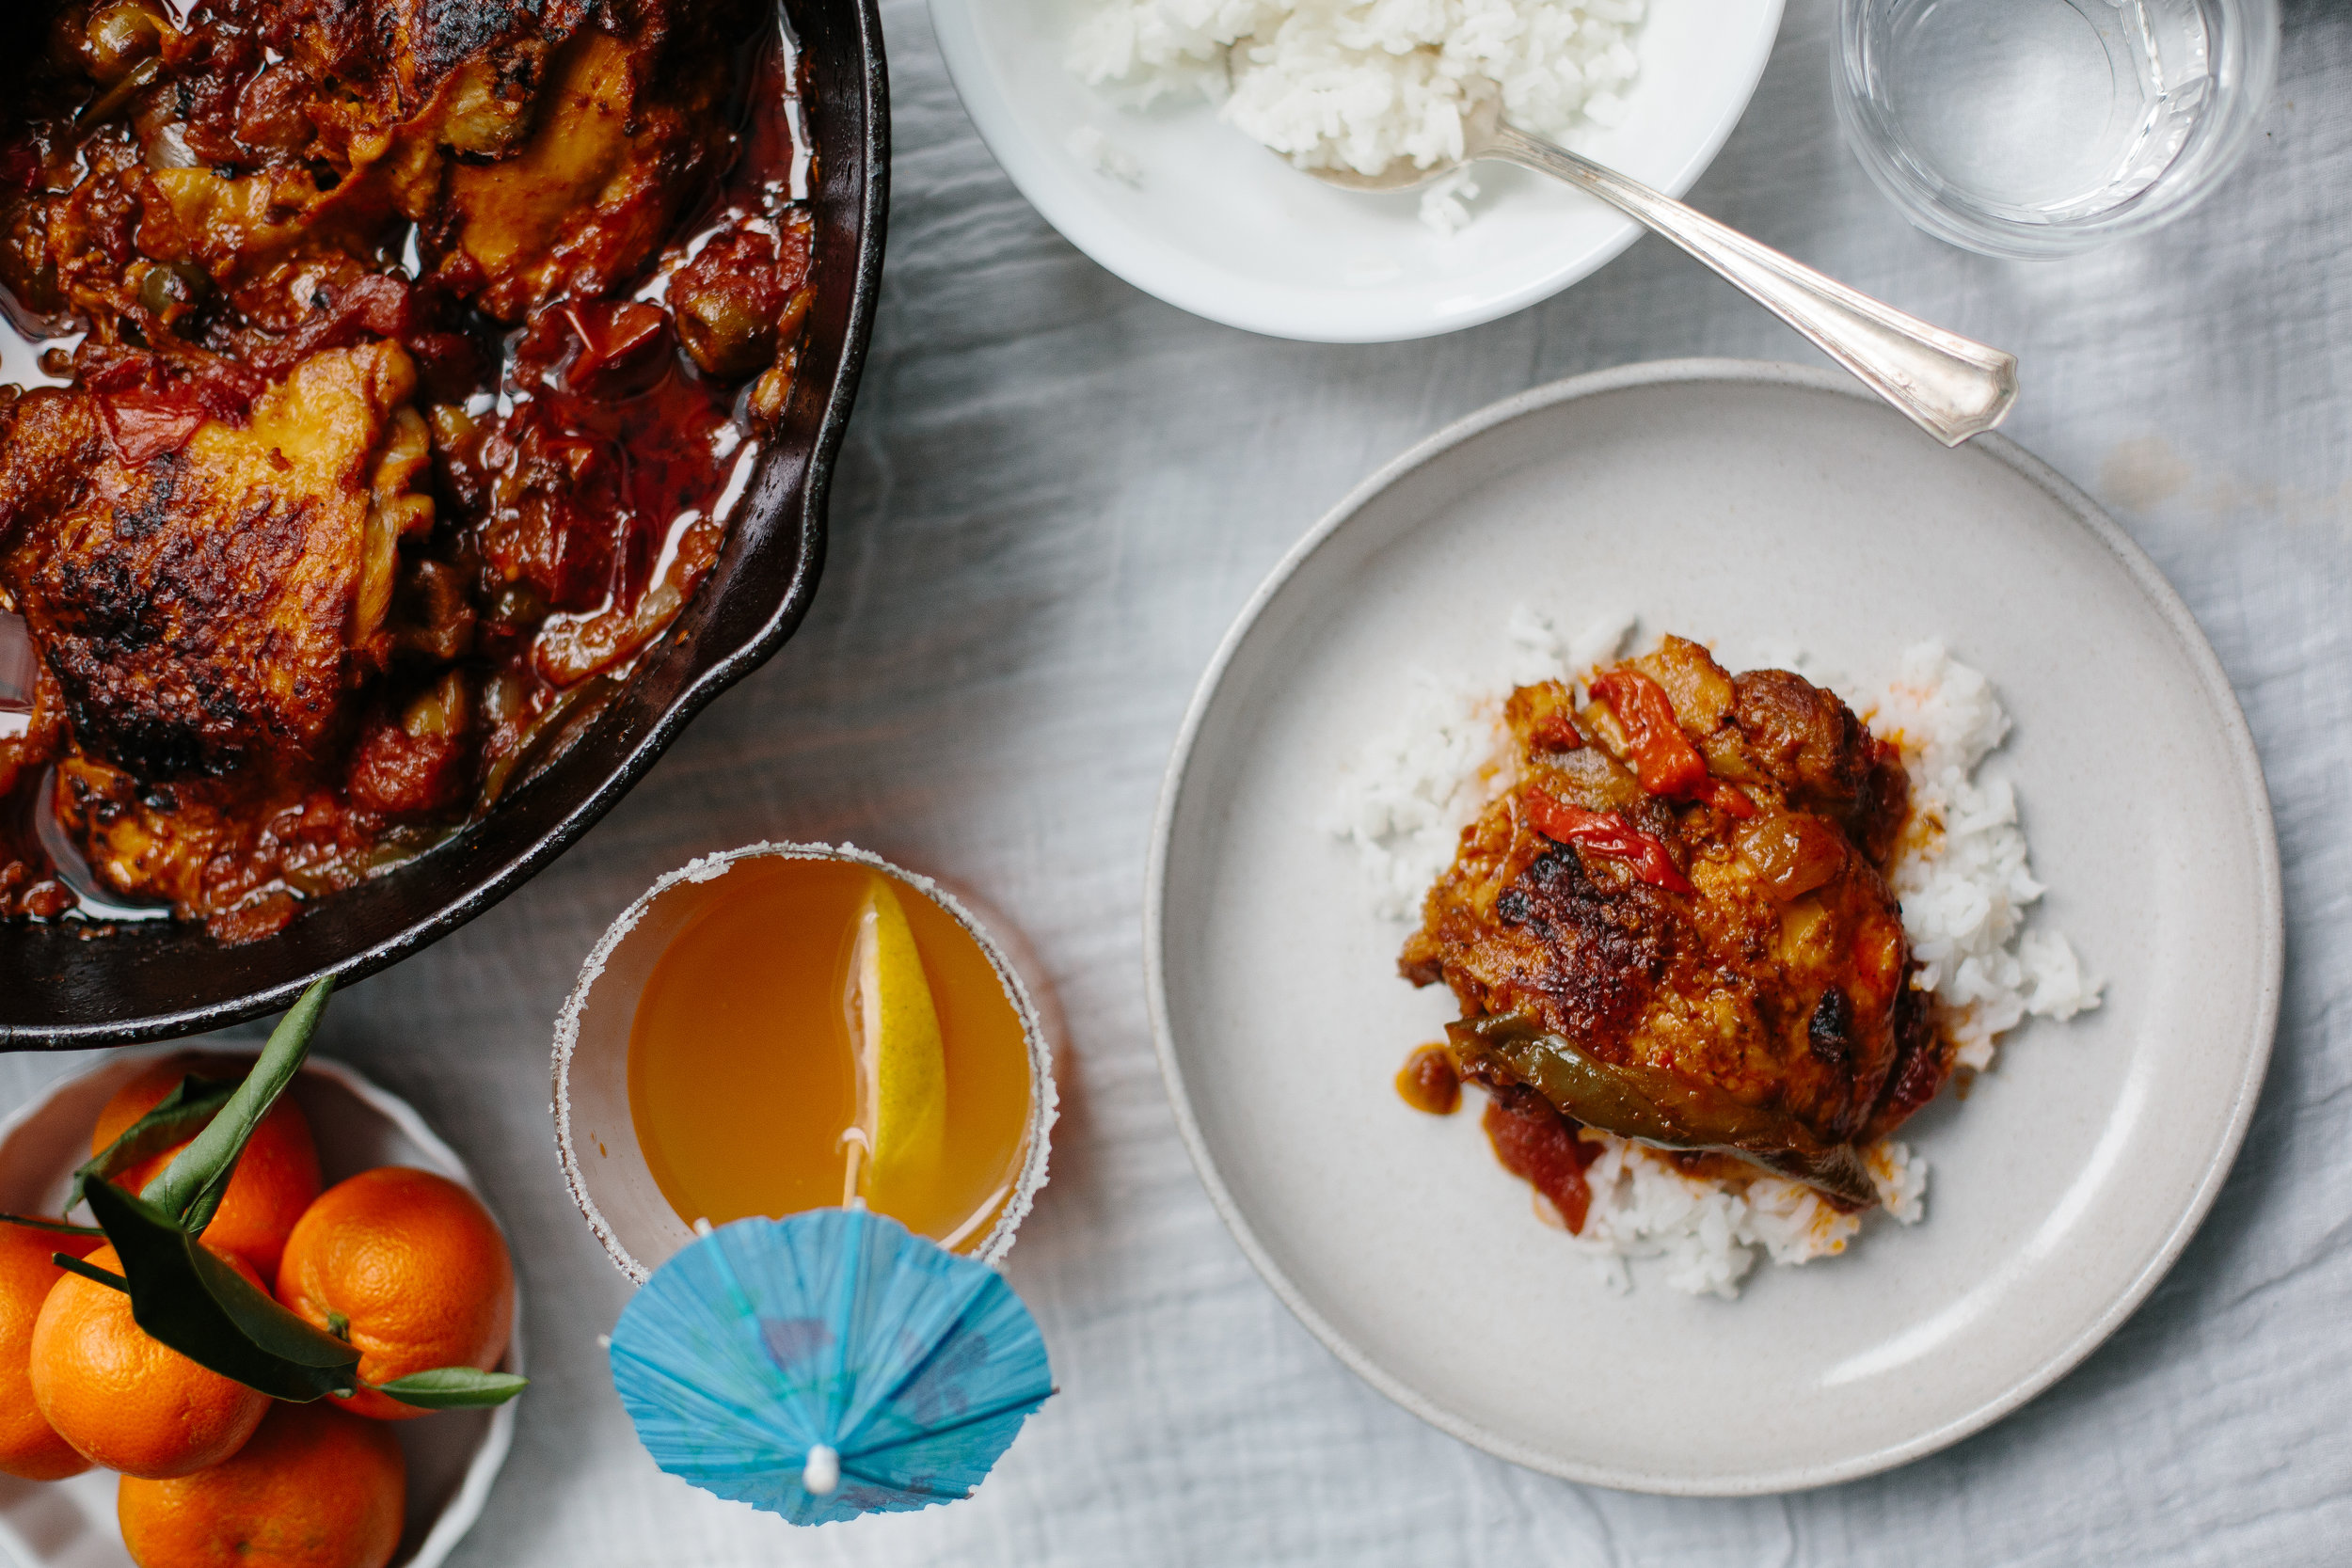
Pollo Guisado and a Rum Spritzer
Trying new foods and eating my way through a new city or country is hands down, my favorite way to travel. You can learn so much about a culture through their food, and there’s nothing better than having a local show you their favorite bbq spot or watering hole as you navigate a new place.
It’s hard to believe it (especially with the current temperatures in DC), but we were visiting the Caribbean just a few days ago on the Carnival Breeze. As a food lover, I was so excited to explore all of the offerings both on and off the boat, especially since I’ve never been on a cruise before. In researching some of the cuisine that we’d encounter at our ports prior to sailing, the Dominican Republic stood out to me. I’d been there a few years ago, and fell in love with the friendly people and the incredibly delicious food. Our final stop on the cruise was in the Dominican Republic, allowing us to try some more of the local food there, including some incredible chicken and fish dishes cooked right on the beach (take me back!).
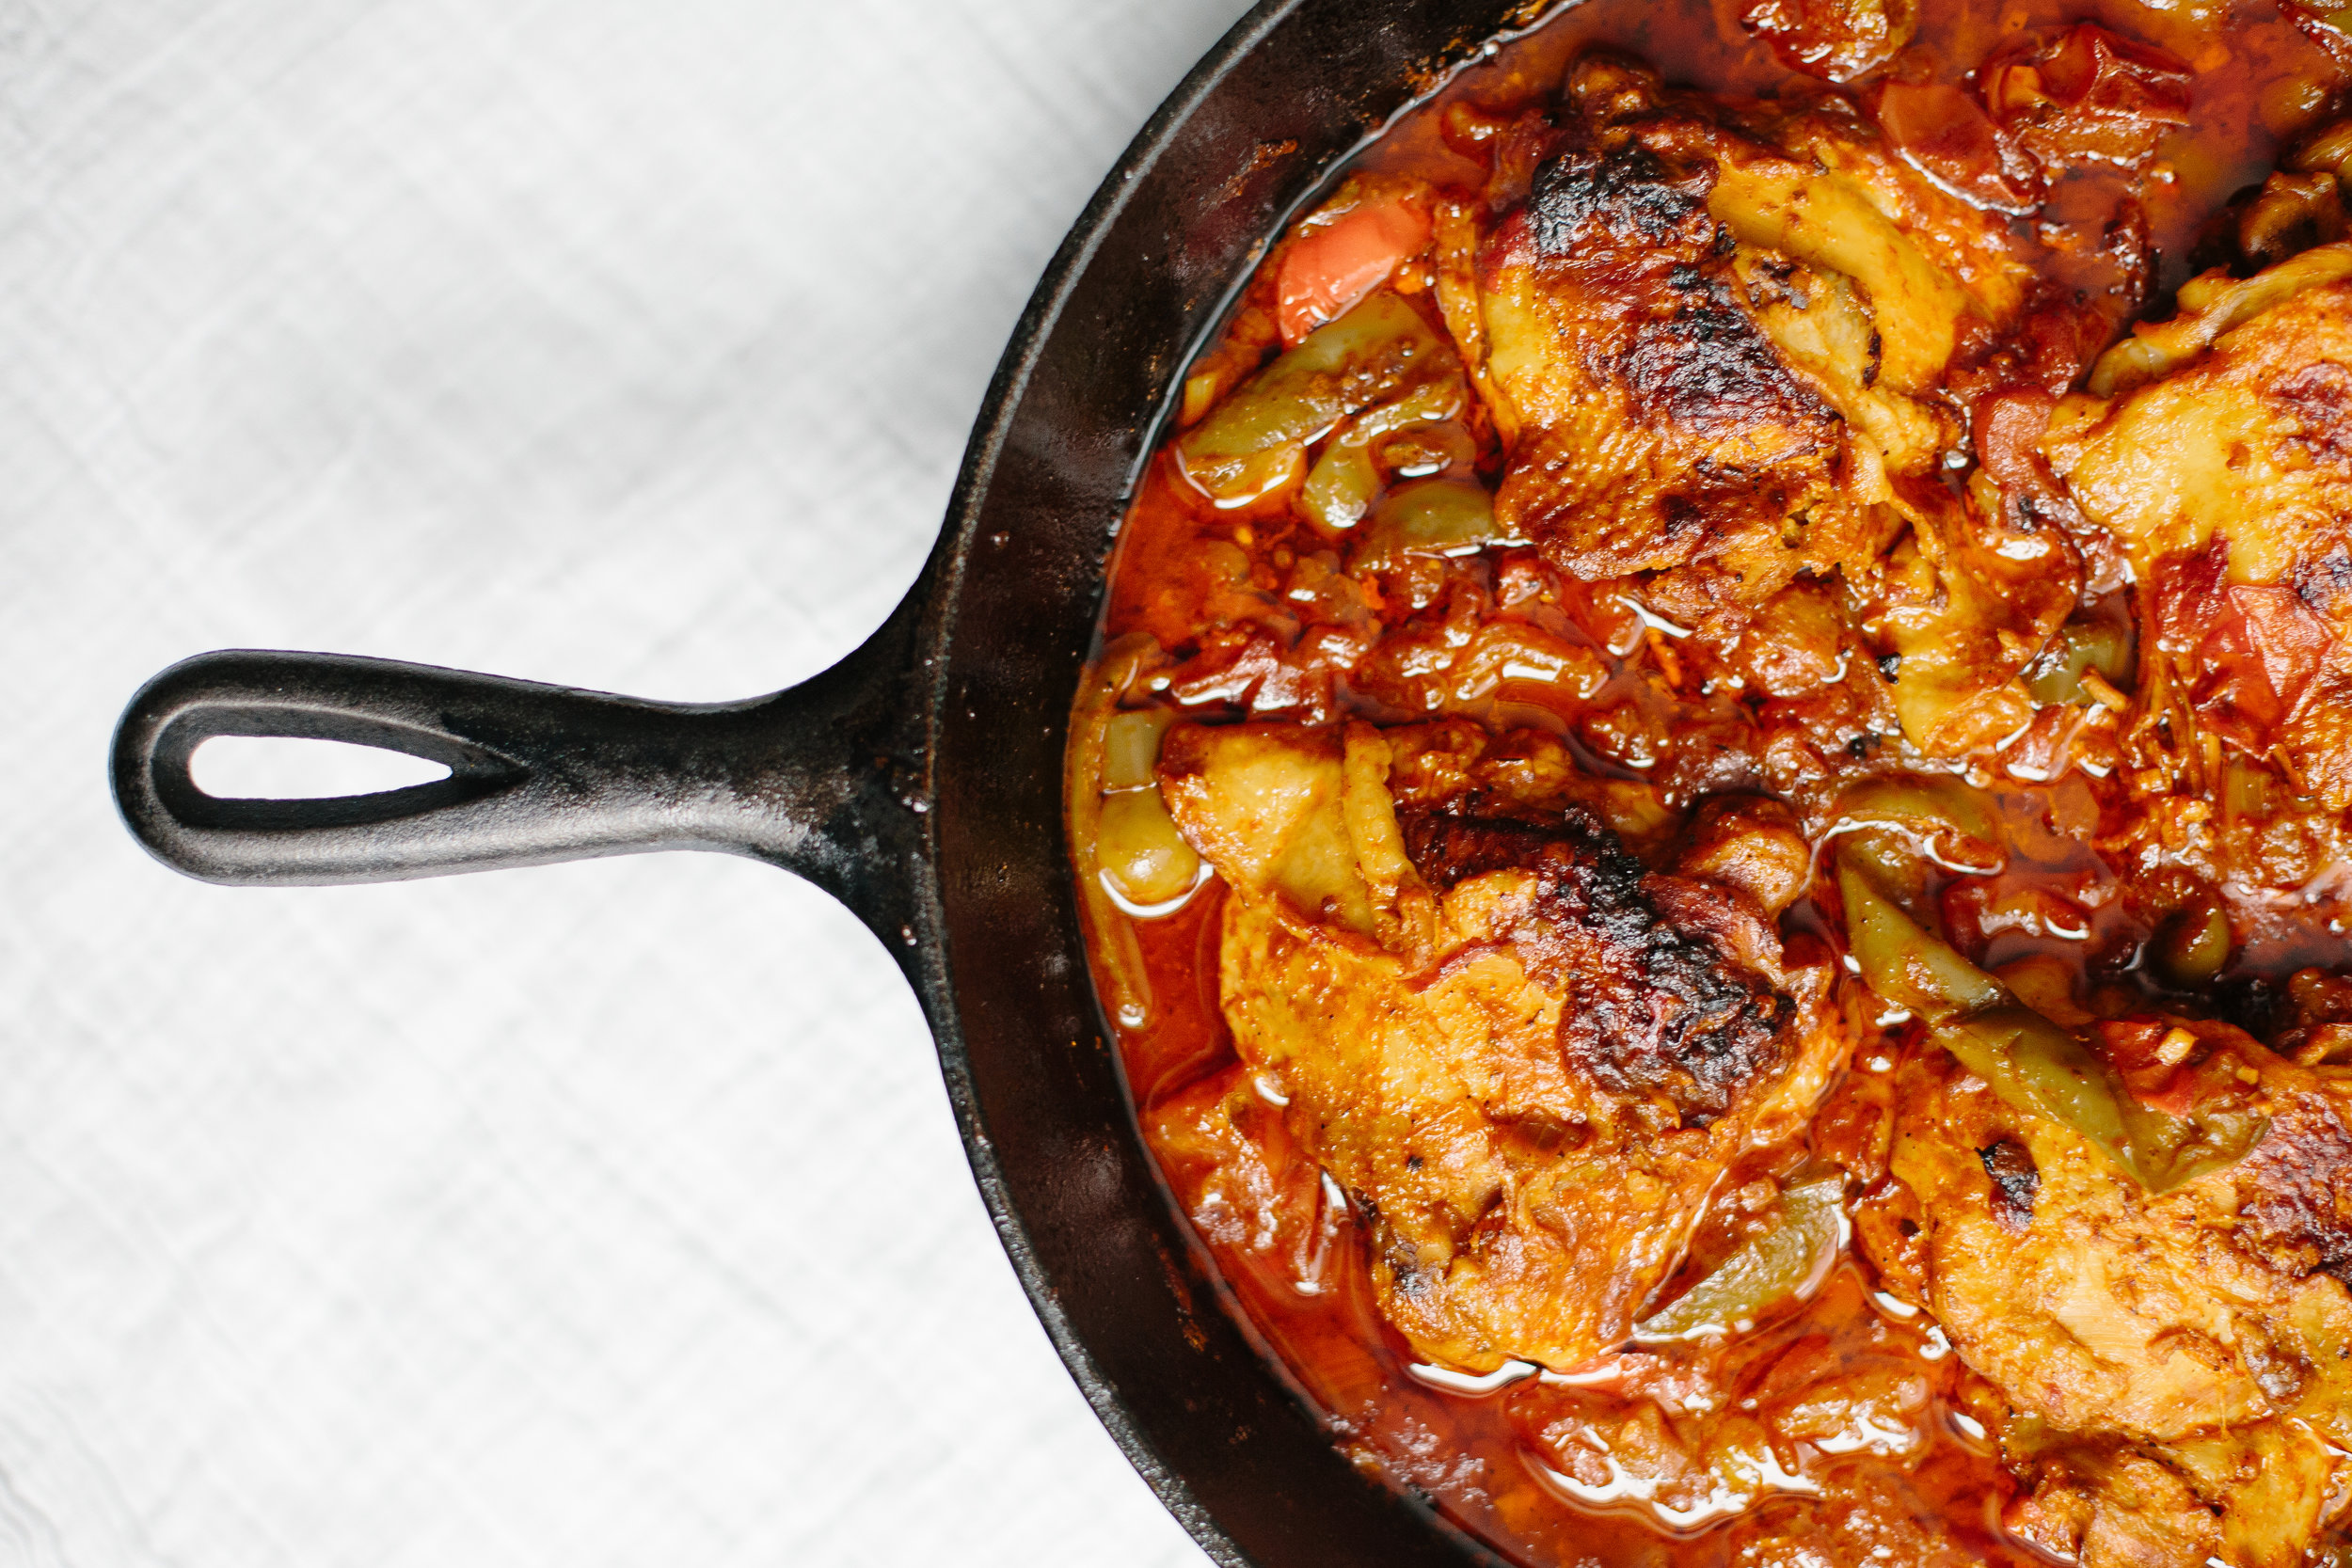
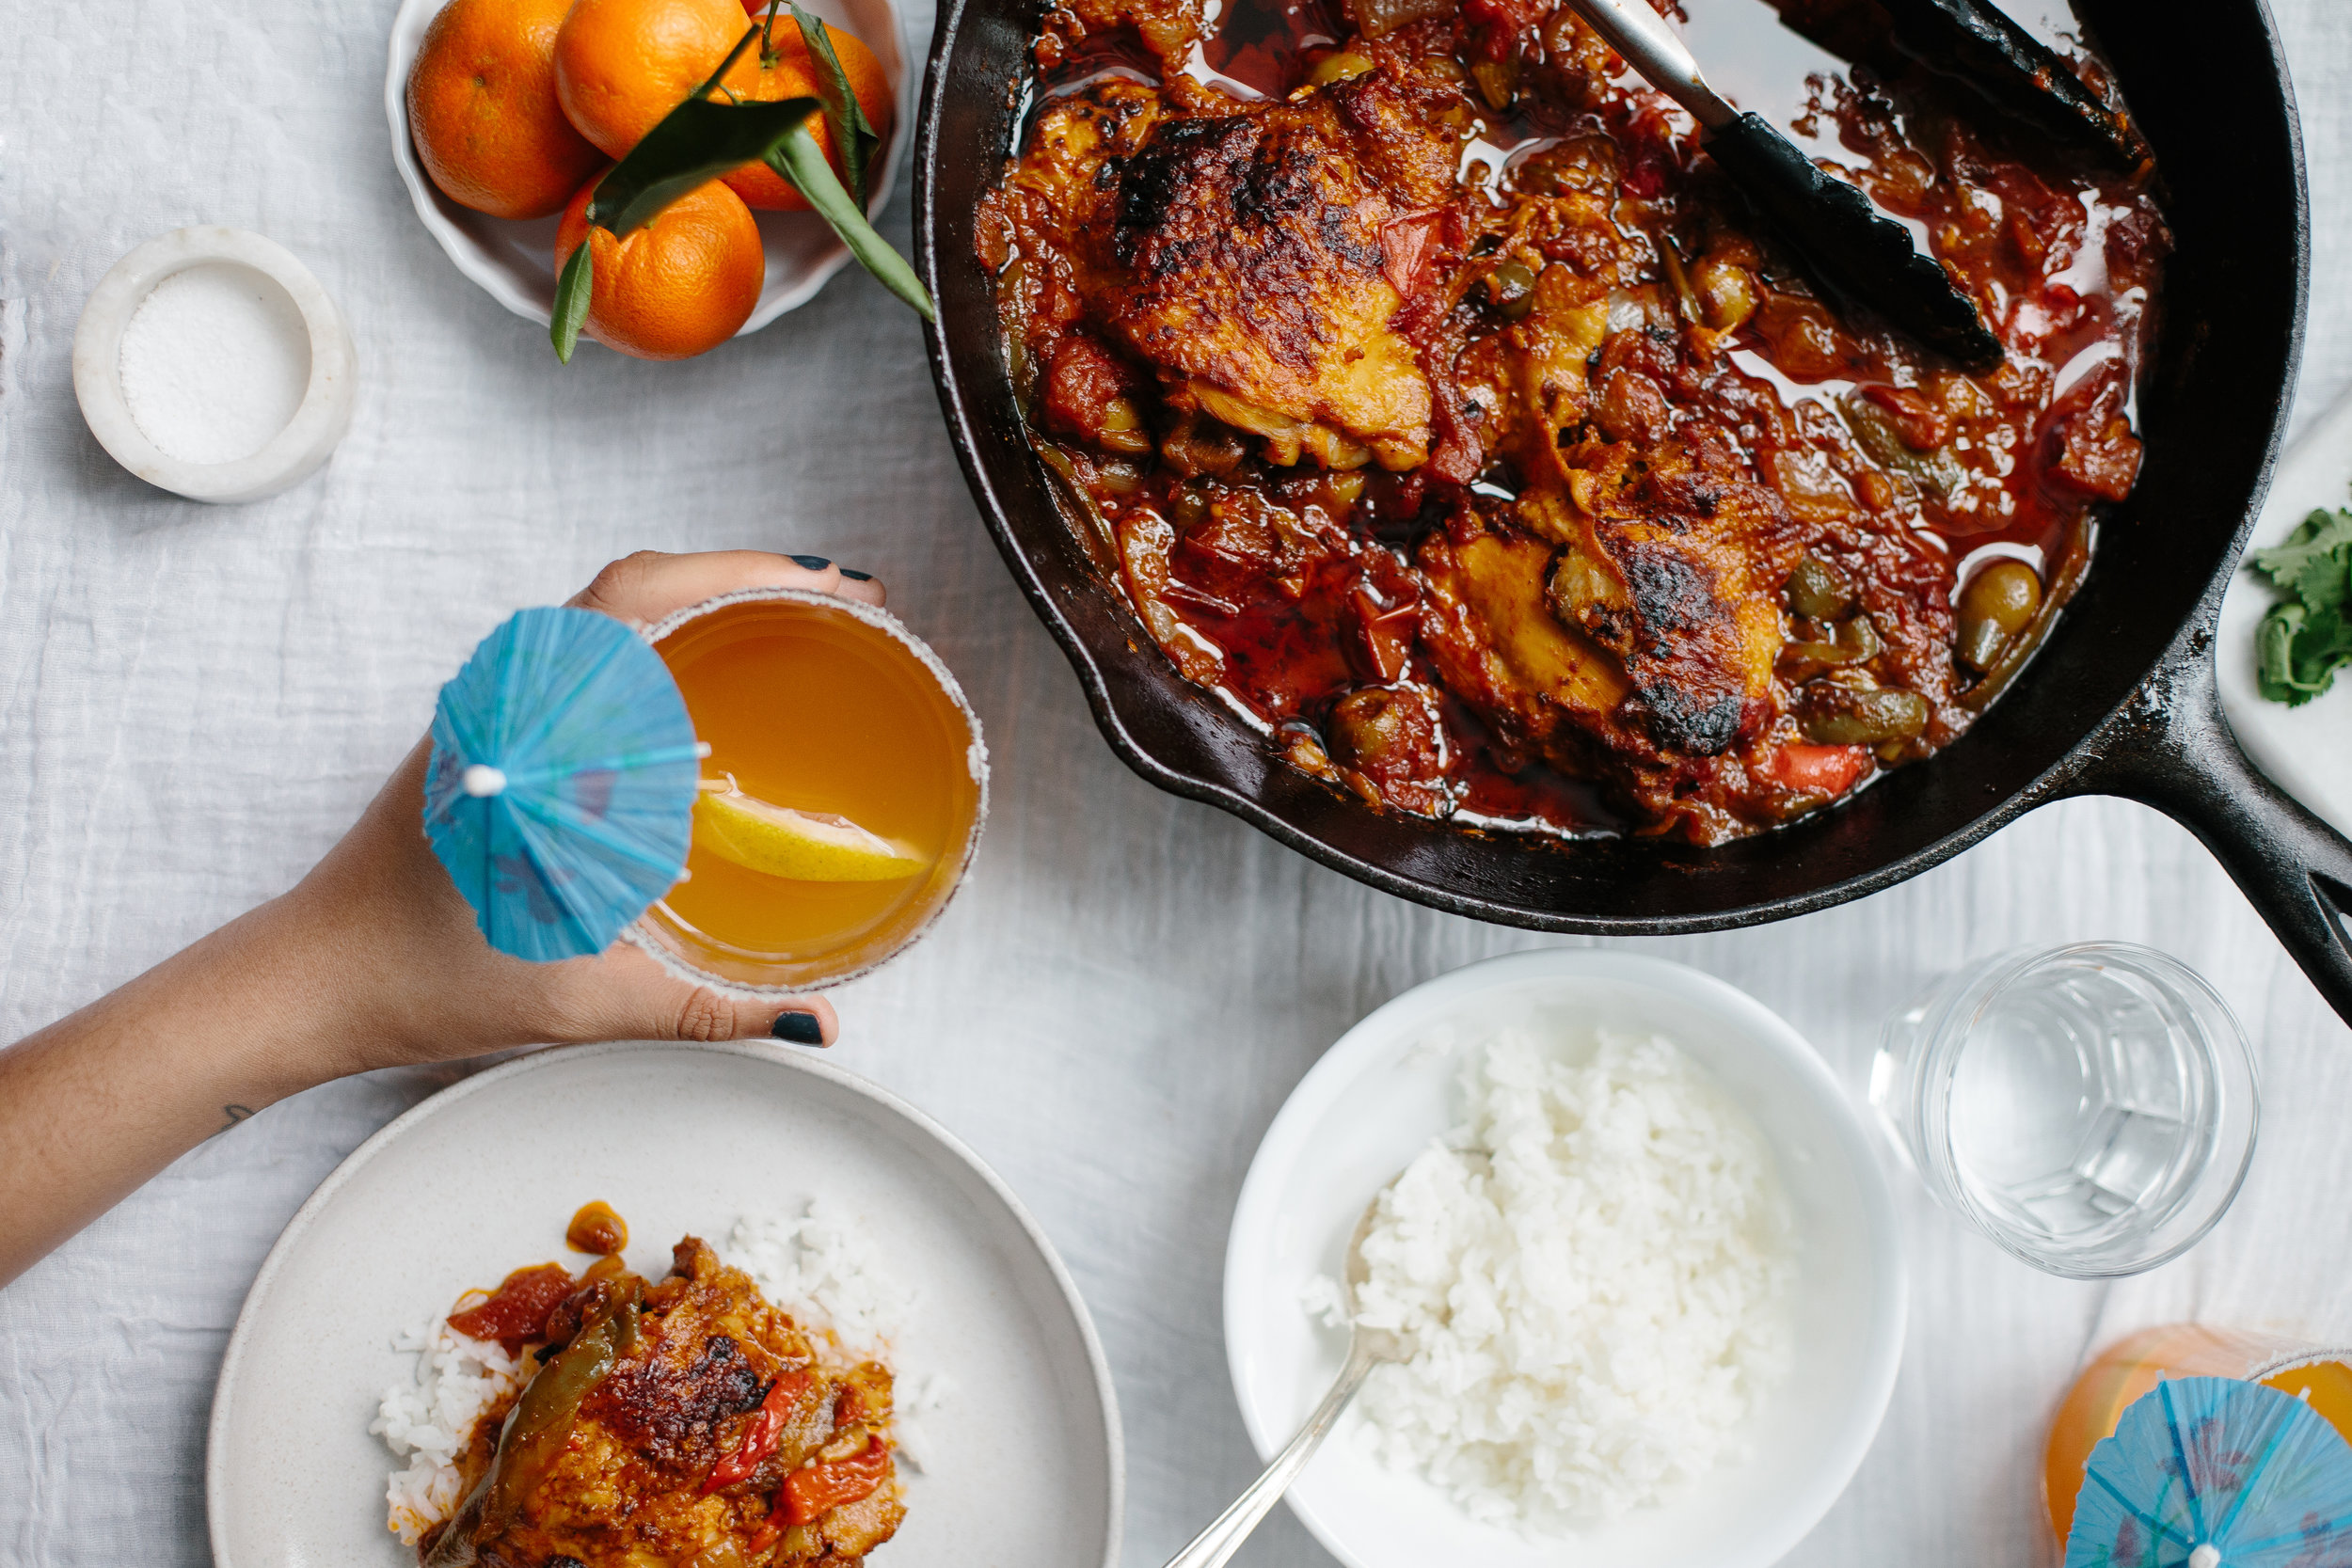
To pay homage to some of the great food we tried on the trip, we opted to try our hand at pollo guisado, a chicken dish that is very popular in the Dominican Republic. Until you make your way to the island yourself, this tasty chicken dish plus a recipe for a cocktail to go along with will have to do!
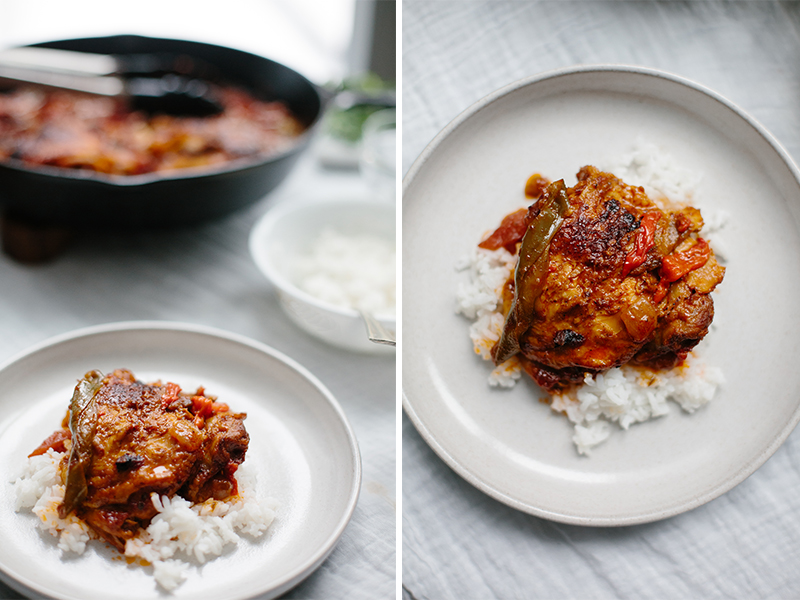
POLLO GUISADO Servings: 4 people
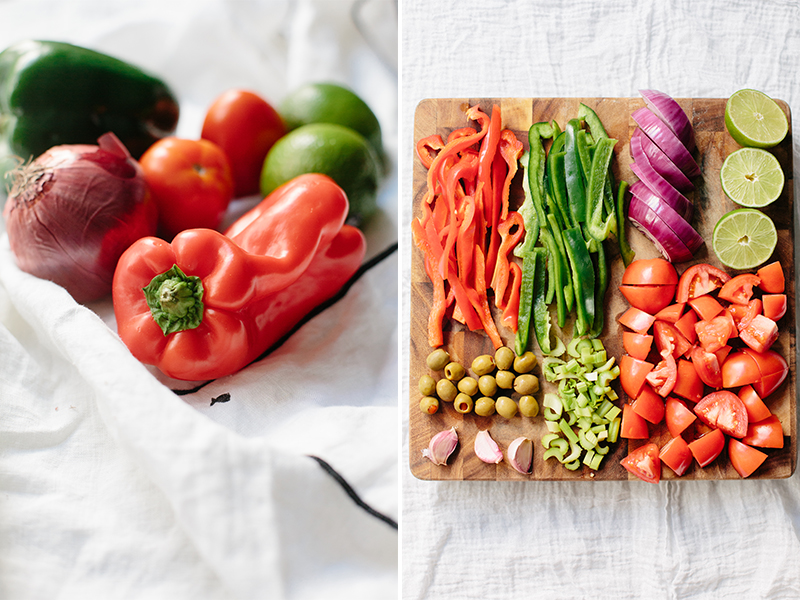
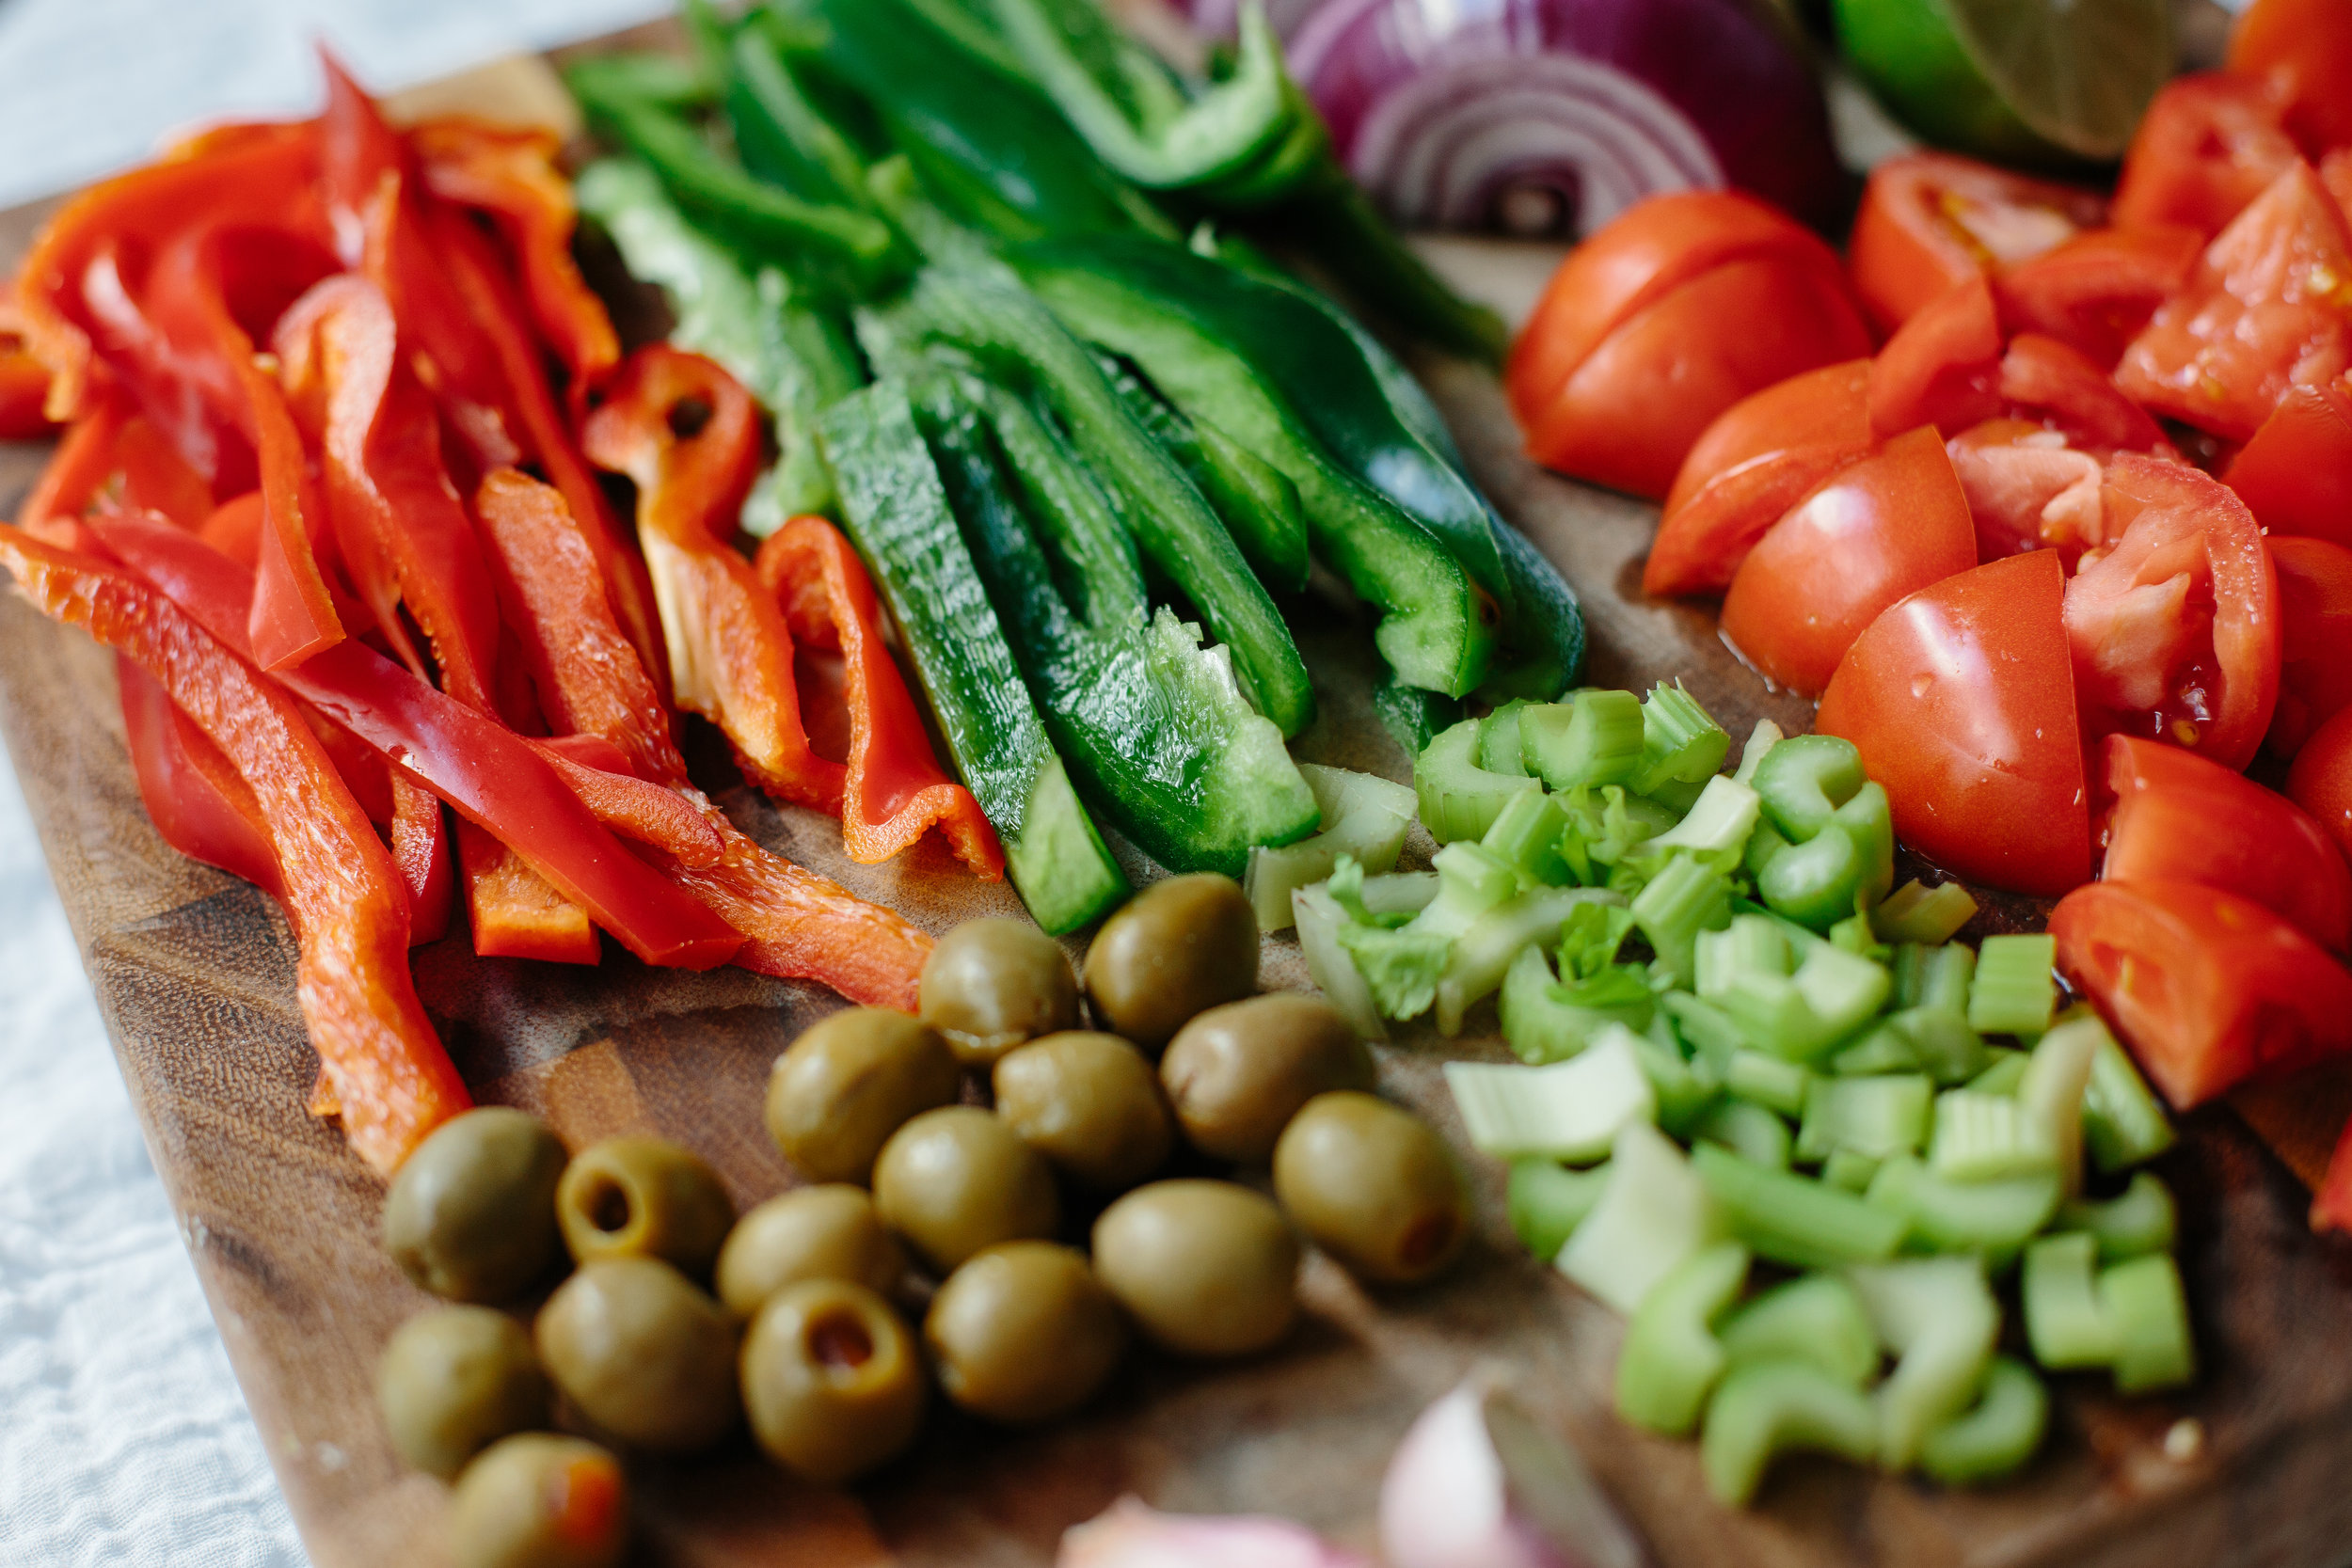
Ingredients:
-2 lbs. of chicken thighs (skin on and bone in) - 2 limes, freshly squeezed - 1 teaspoon of oregano - 1 small onion, chopped - 2 stalks celery, chopped - 3 cloves of minced garlic - 2 tablespoons of vegetable oil - 1 teaspoon of sugar - 4 small tomatoes, chopped - 2 bell peppers, sliced - 1 jalapeno, diced with seeds removed - 15-20 green olives - 1 cup (8 oz.) of tomato sauce - cilantro for garnish - 1 teaspoon of salt - 1⁄2 teaspoon of pepper
Directions:
- Squeeze the juice of both limes over the chicken thighs in a large bowl
- Mix together the chicken, oregano, onion, celery, salt, pepper and garlic. Marinate for at least 1 hour in the refrigerator
- Heat oil in a large pot and add in the sugar, browning it slightly over medium-high heat. Be careful not to burn it!
- Add the chicken to the pan and cook for just under an hour on each side until browned
- Add 1⁄4 cup of water. Cover and simmer over medium heat for 15 minutes, stirring occasionally
- Add onion, celery, tomatoes, bell peppers, olives, jalapeno and garlic. Cover and simmer until the vegetables are cooked through, about 5 minutes
- Add the tomato sauce and half a cup of water, simmer over low heat for 30-45 minutes to let the liquid reduce. Add salt and pepper to taste.
- Plate each piece of chicken with some fresh cooked rice and top with cilantro
CITRUS RUM SPRITZER
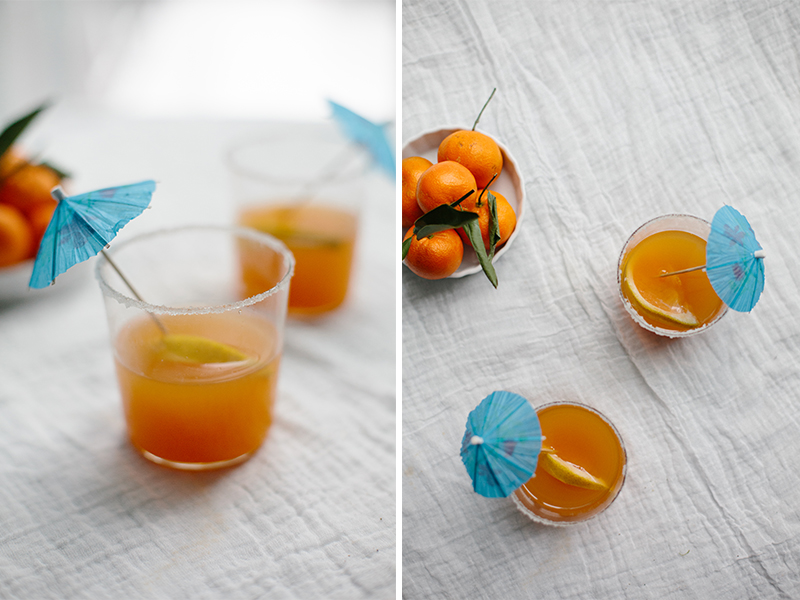
Ingredients
- 1 oz. freshly squeezed orange juice - 1 oz. freshly squeezed grapefruit juice - 2 oz. dark rum - 1⁄2 oz. simple syrup - 2 oz. seltzer water

Directions:
-
Combine the grapefruit juice, orange juice, rum and simple syrup in a cocktail shaker with ice. Shake vigorously for at least 15 seconds
-
Pour liquid into a glass and top with seltzer water
![]()
This post was created for Away We Go with Carnival, the destination for getting in the getaway state of mind. Head on over.
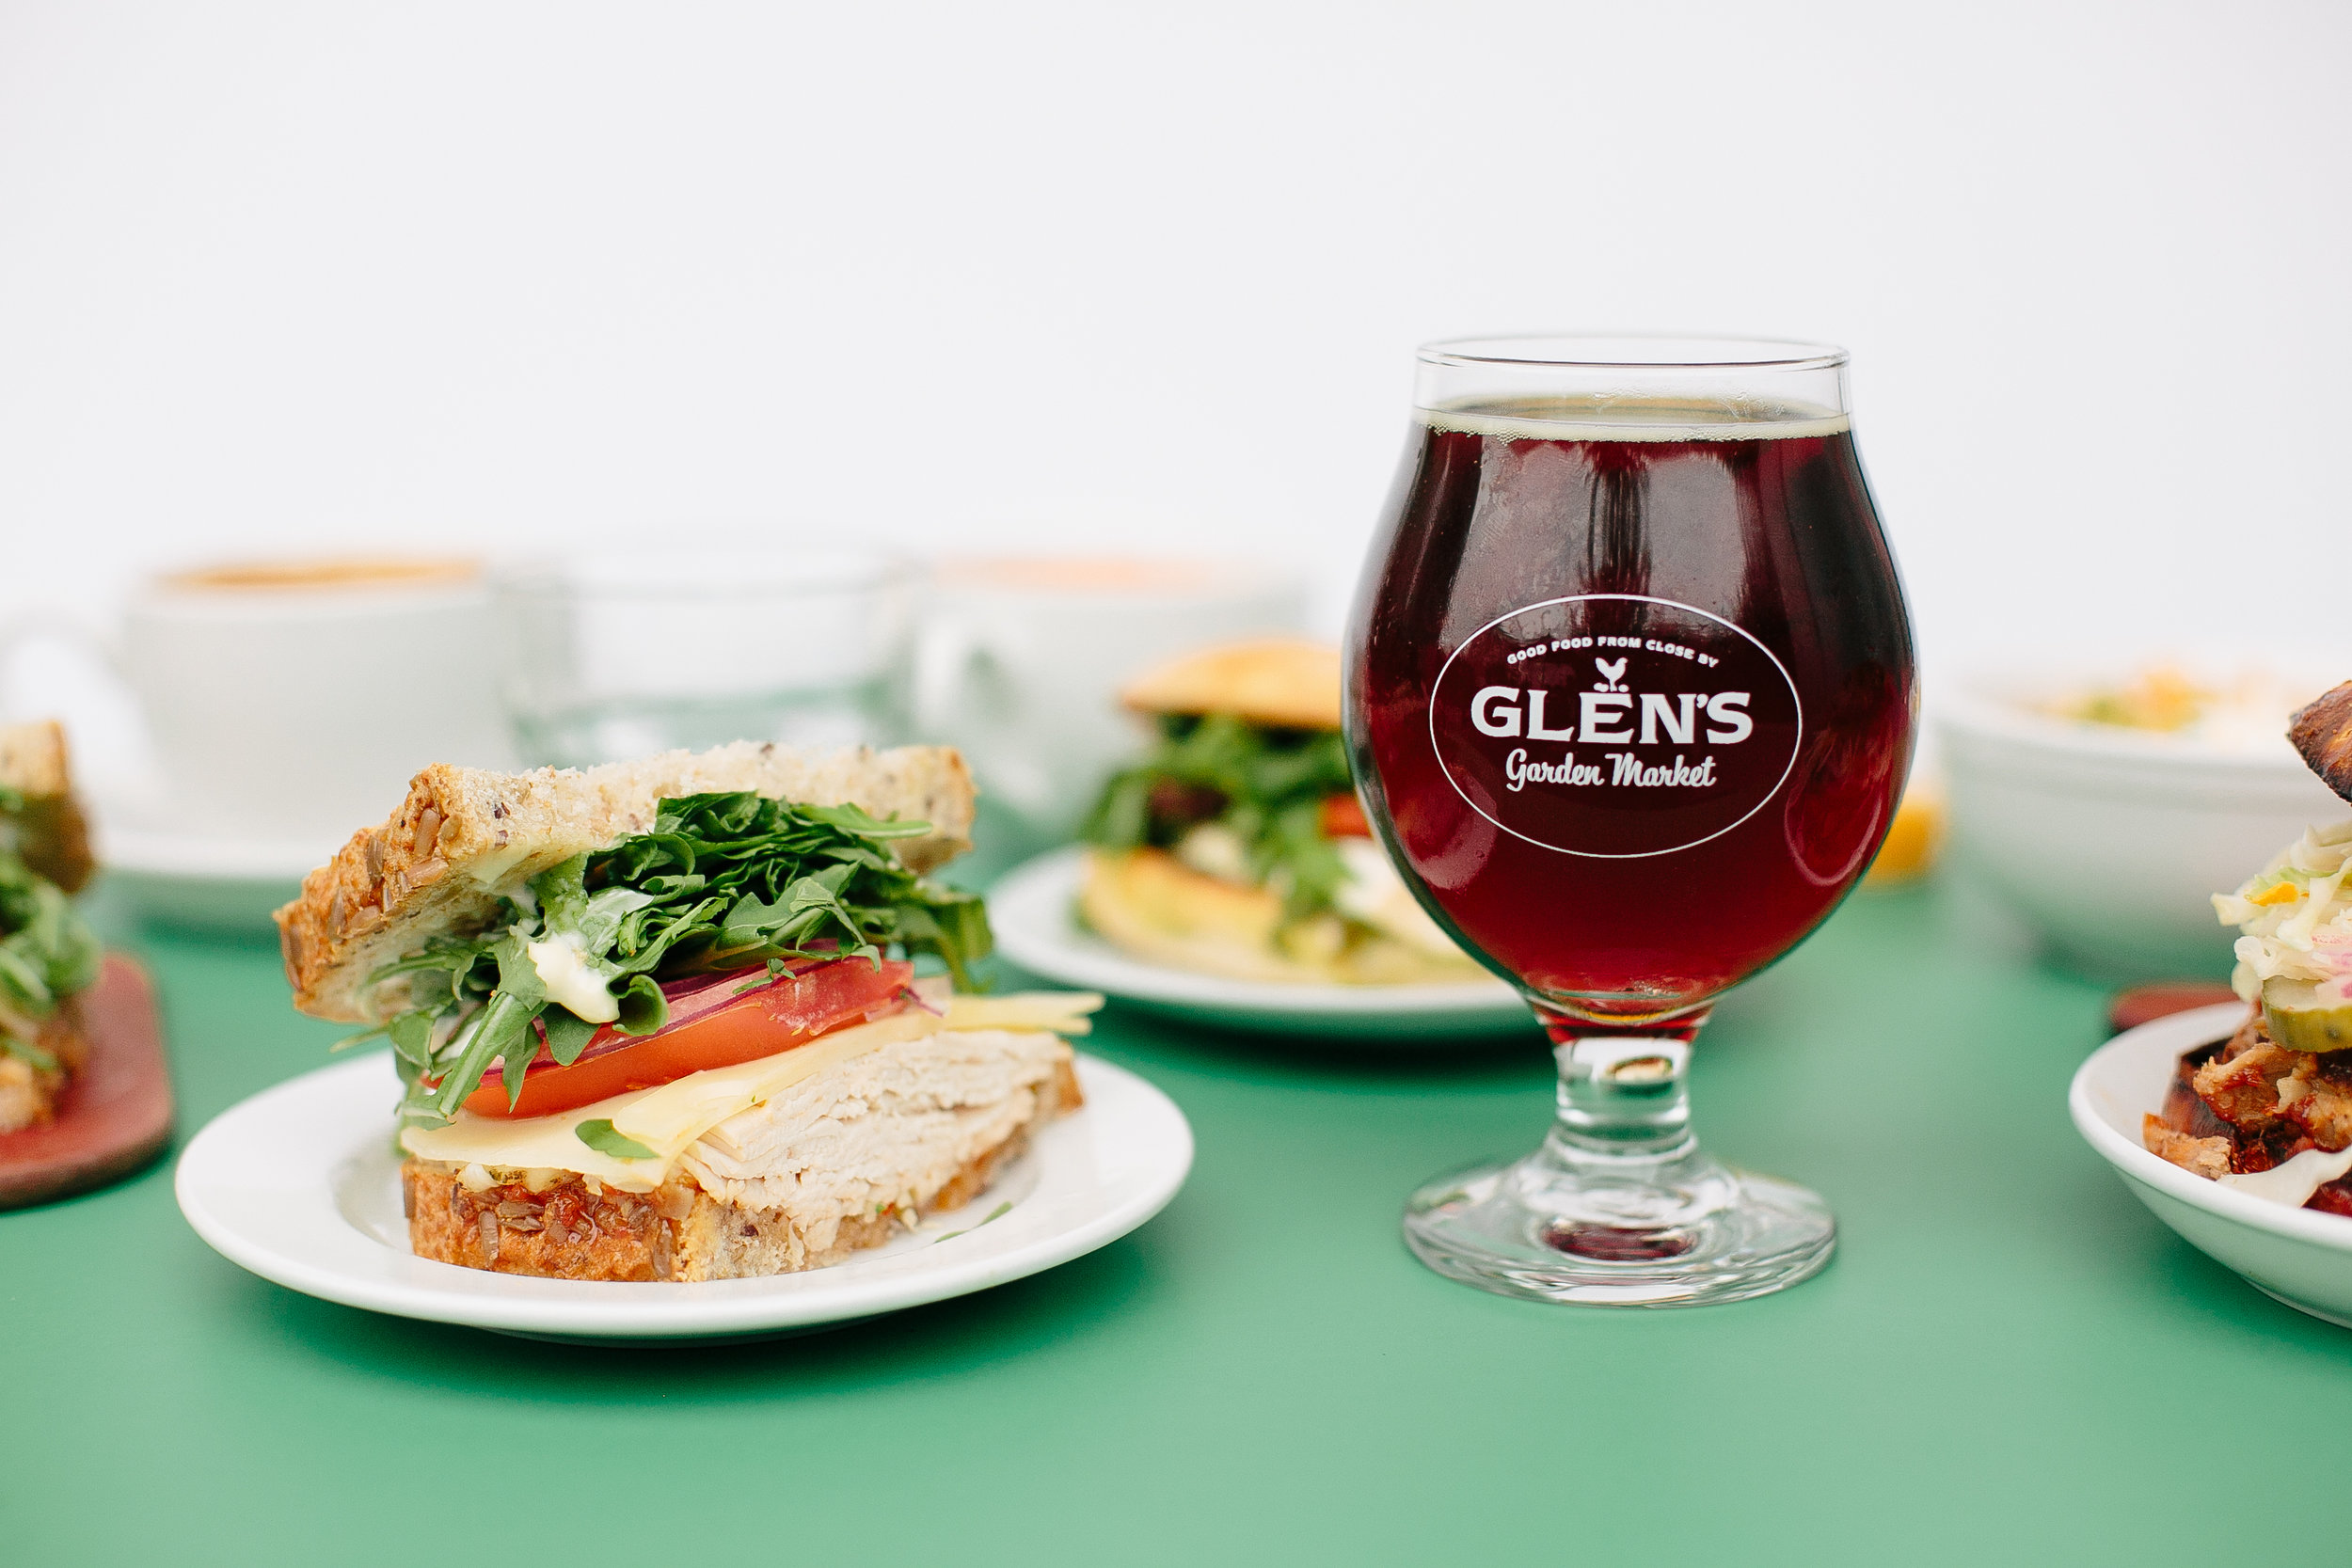
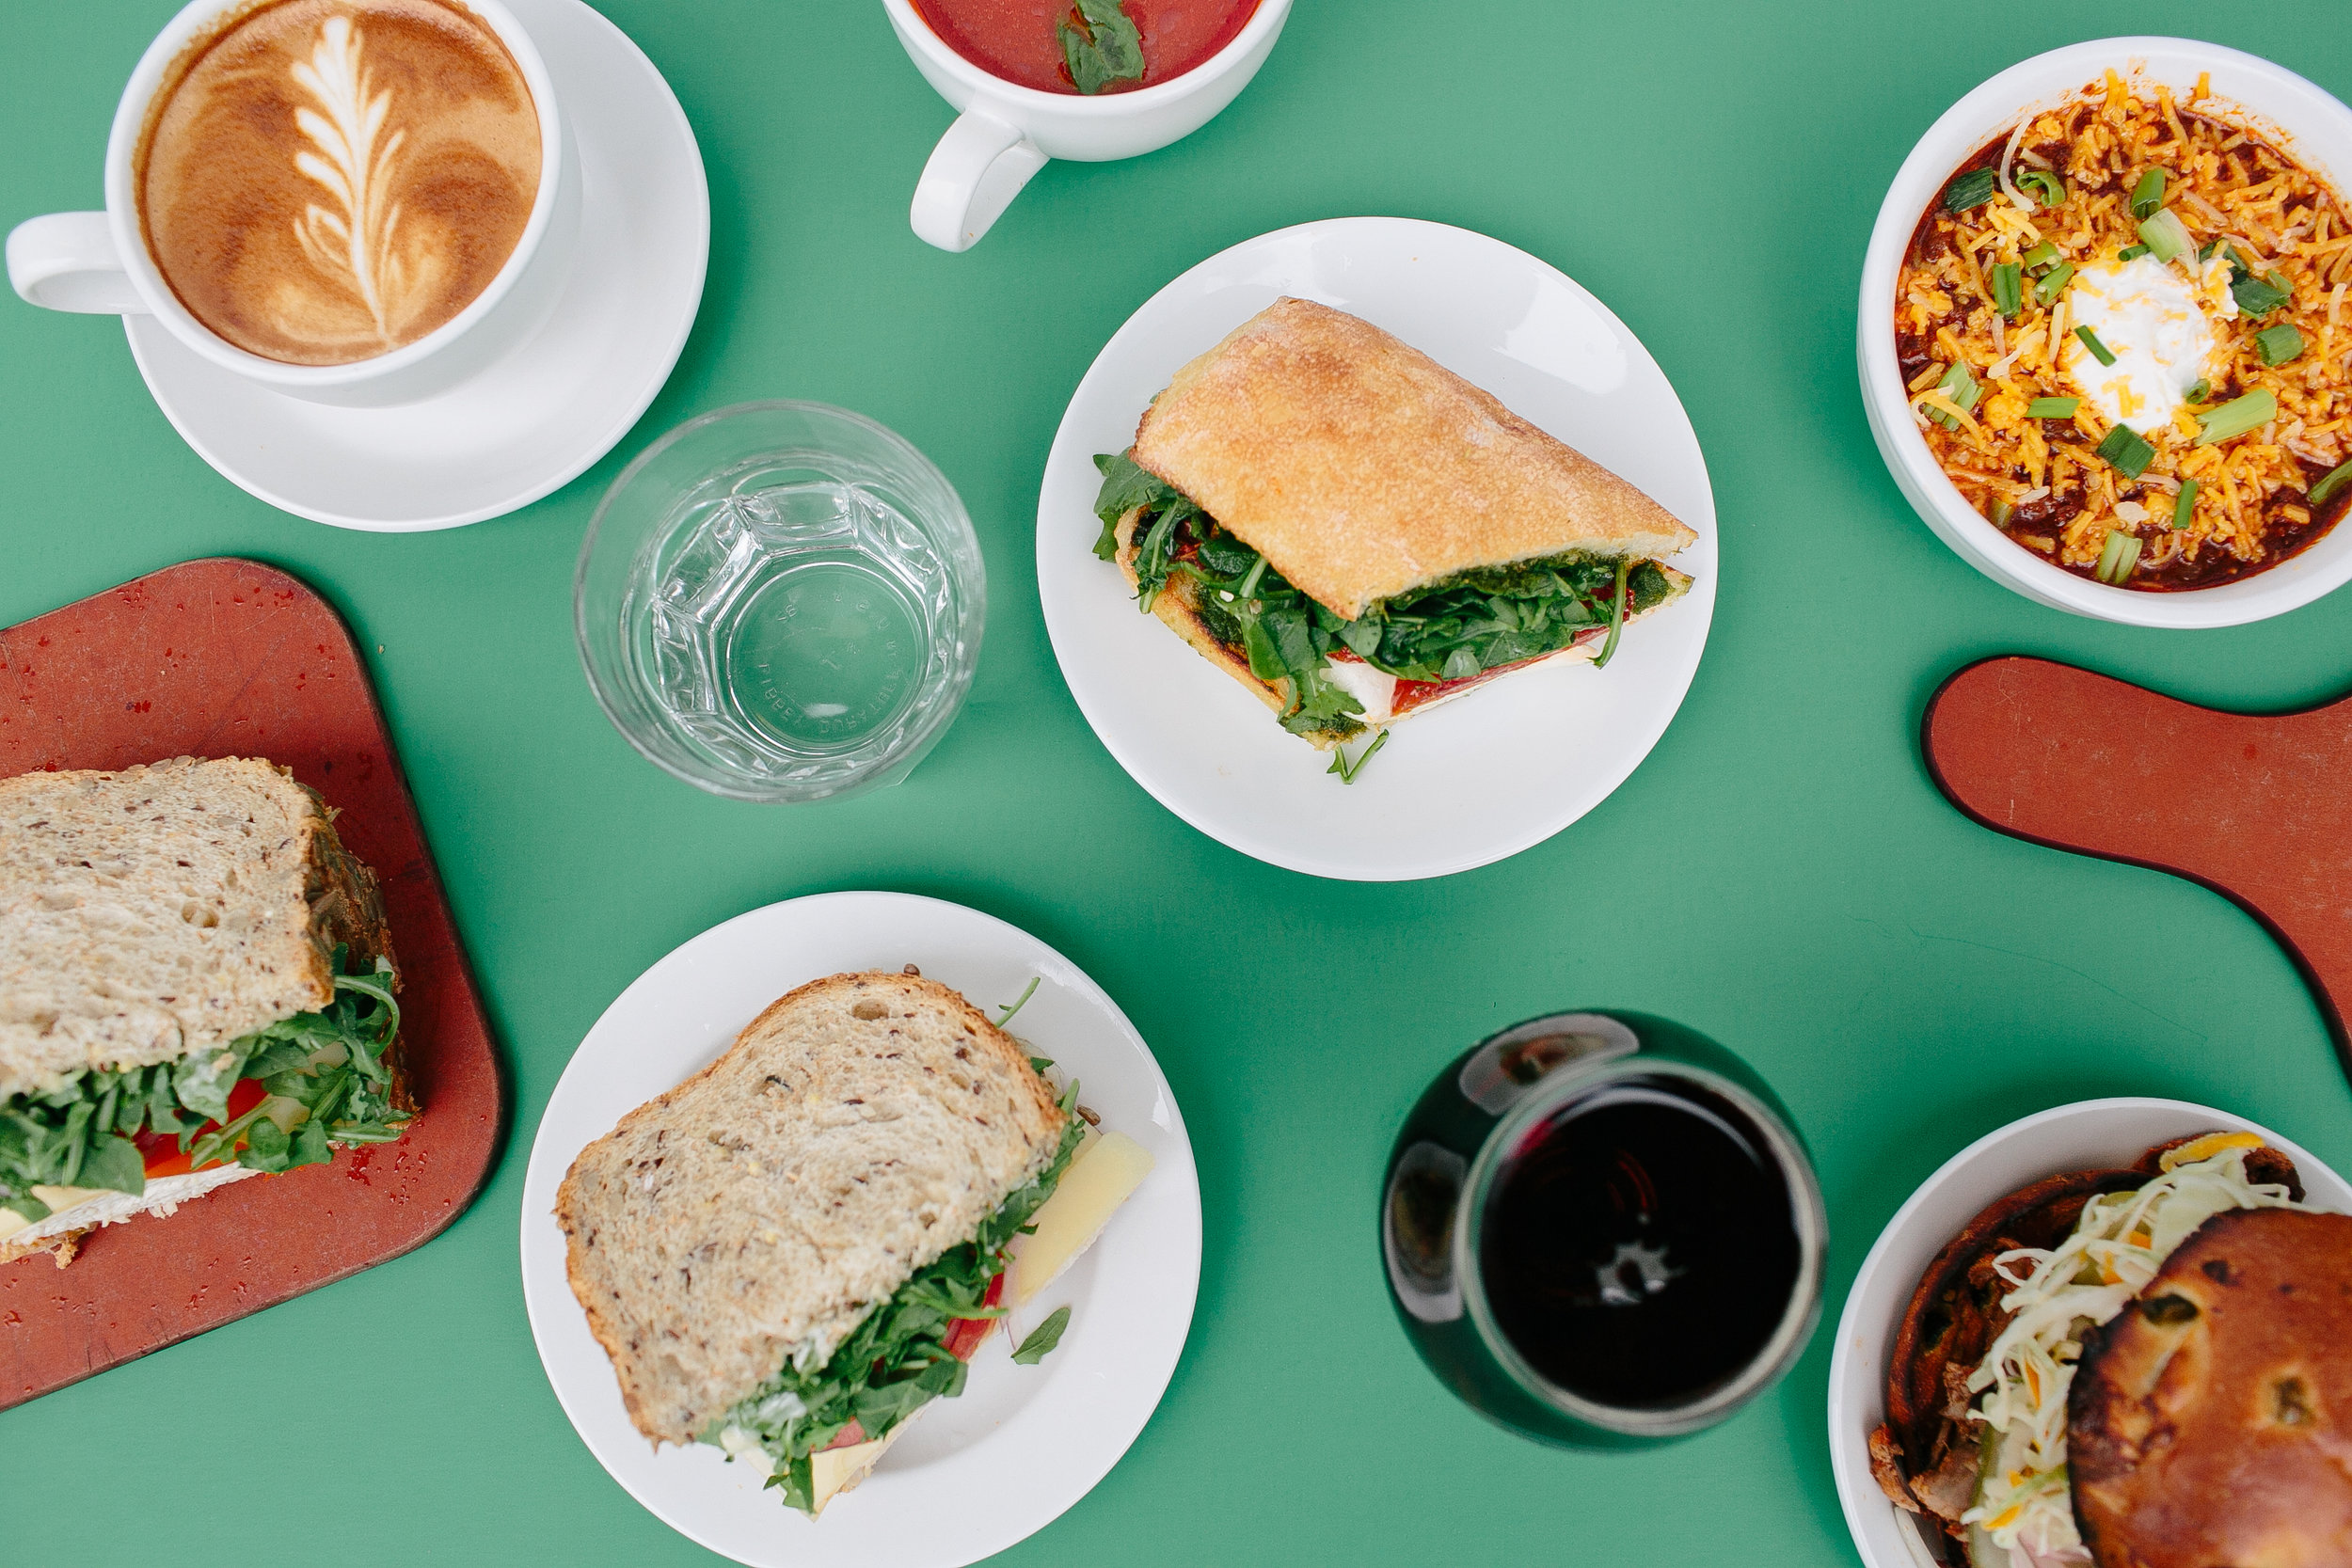
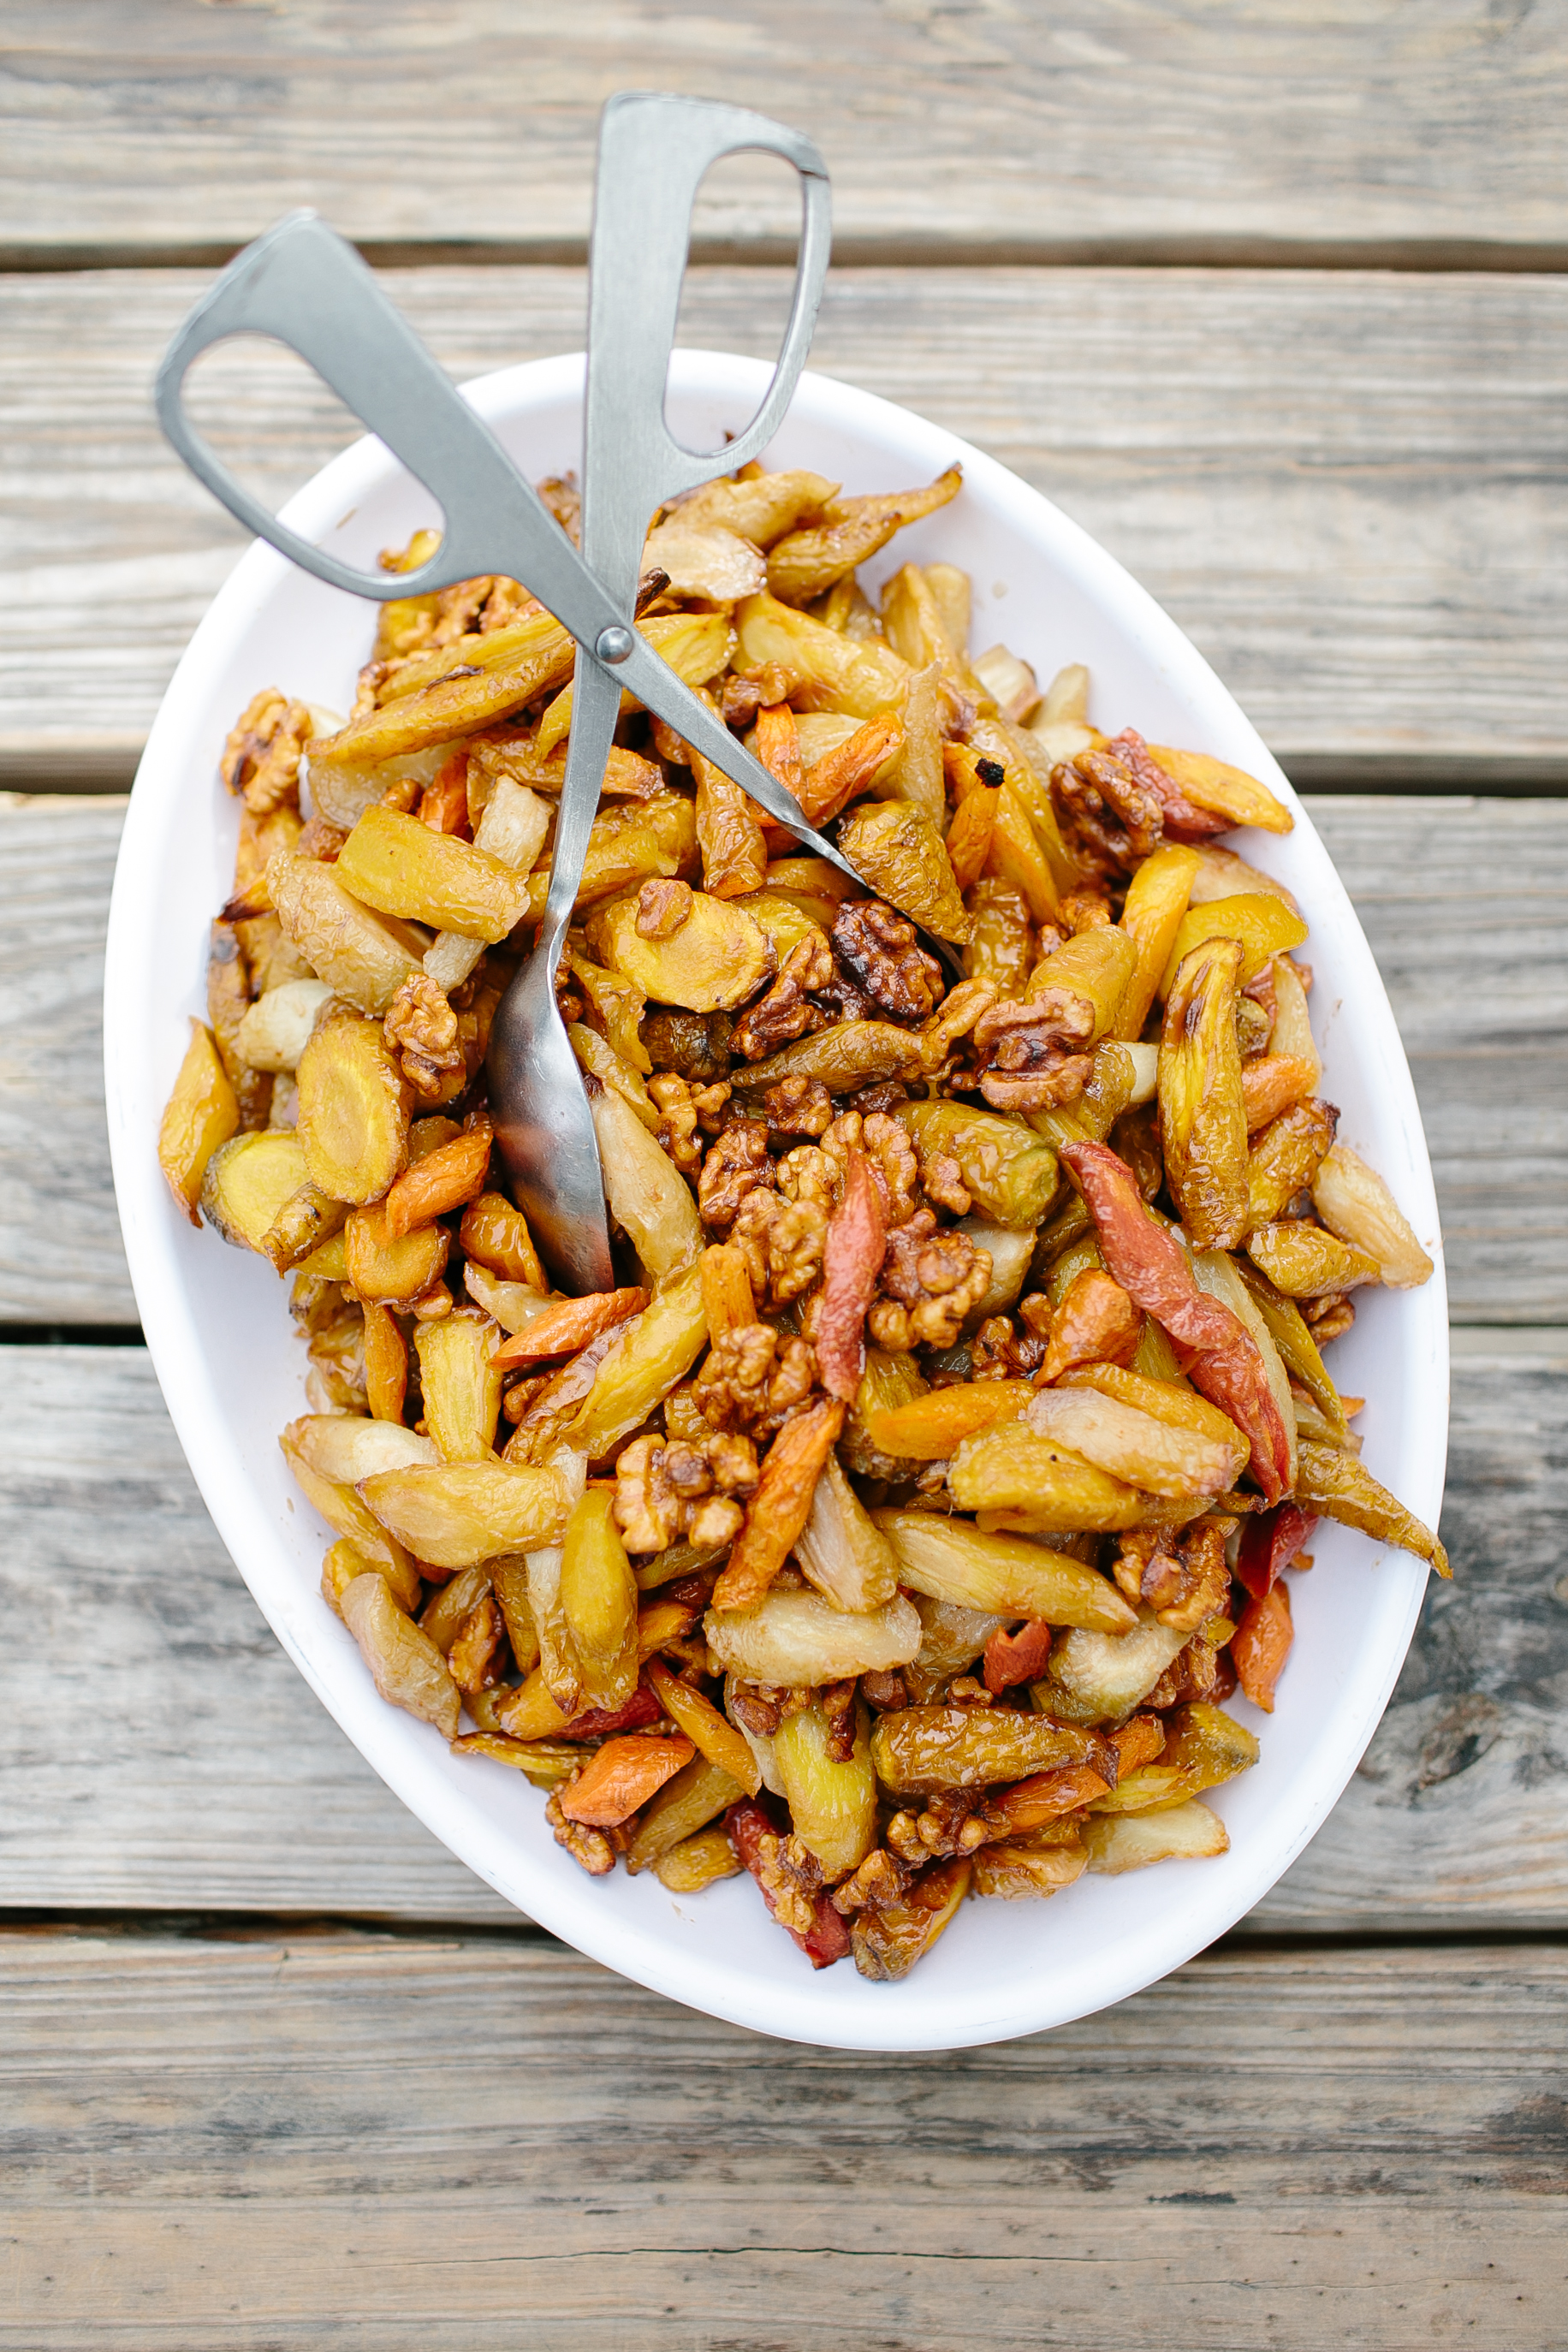
Glen's Garden Market
Here are a few shots from a recent shoot with Glen's Garden Market. If you live in DC and haven't been, it's worth checking out immediately. These photos were taken at their Dupont Circle location, but they've just opened a second one in Shaw which is a convenient 7 minutes from my apartment (!!!). The food is all fresh + local, beers at always $4, and the market stocks every amazing local food product imaginable.
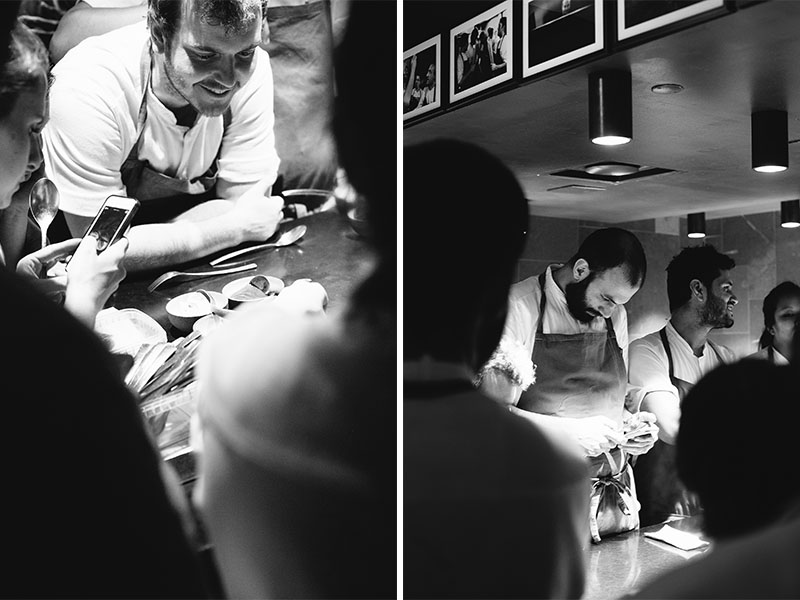
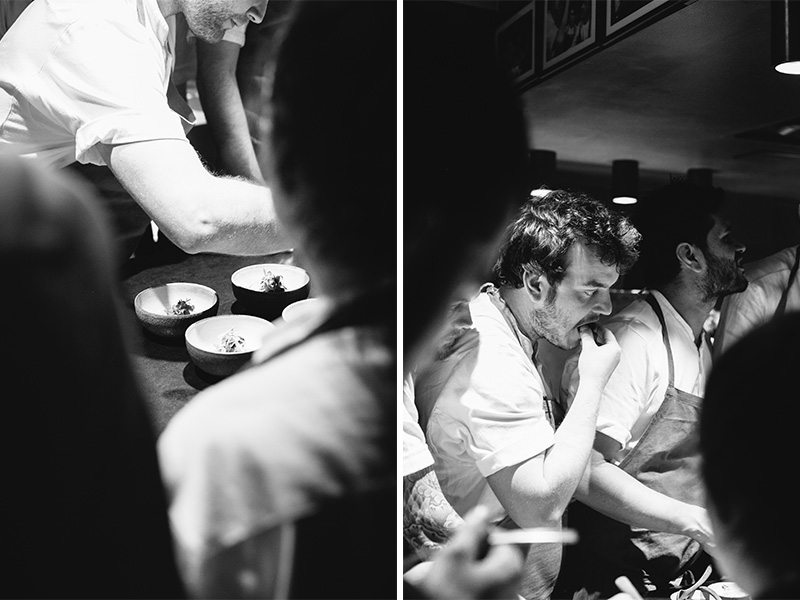
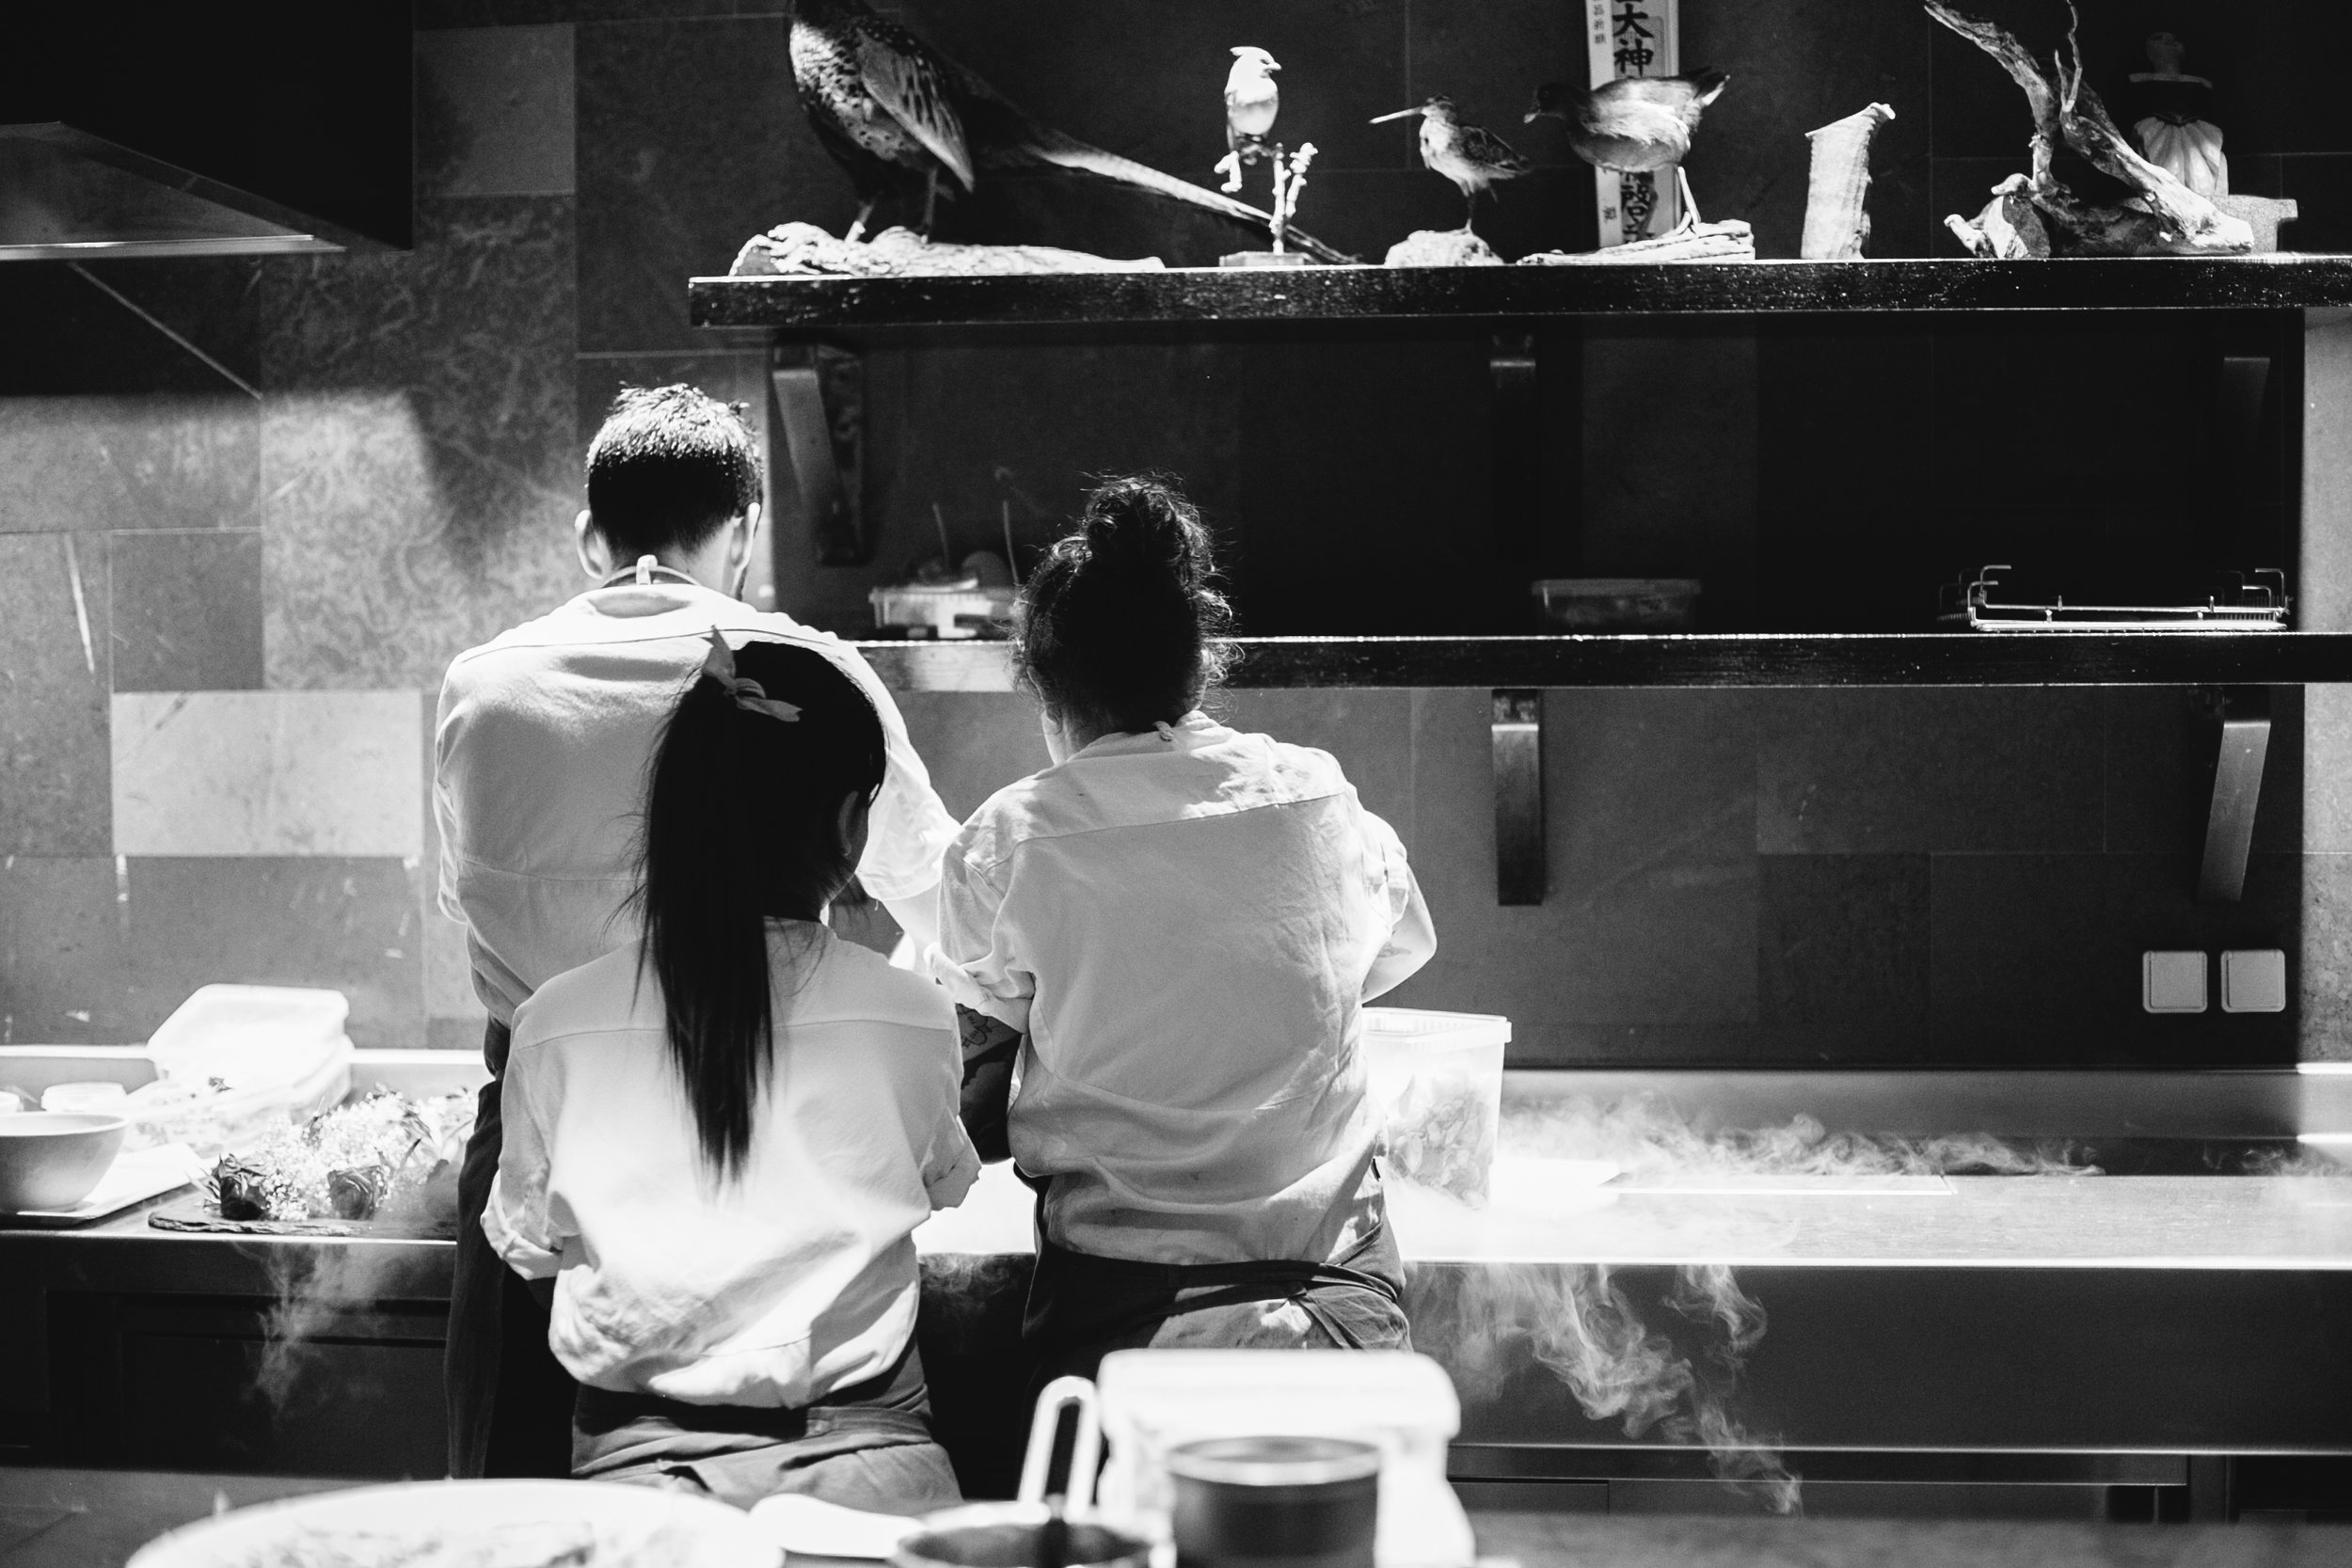
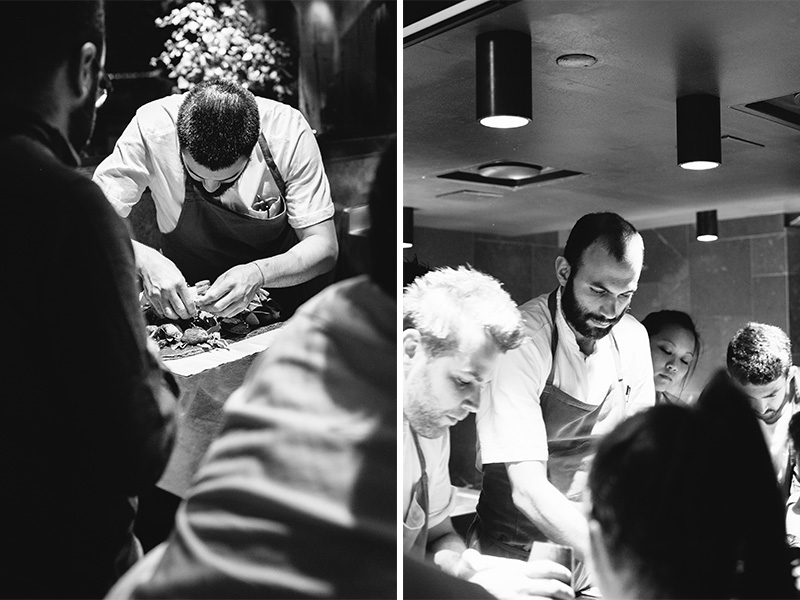
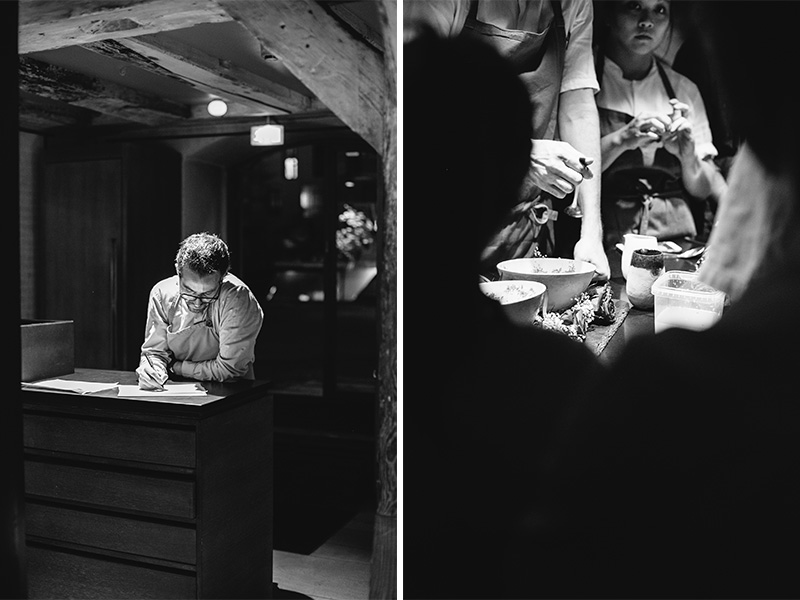
Noma's Saturday Night Projects
I have so much more to share about my trip to Noma earlier this summer, but I wanted to start with one of my favorite parts, their Saturday Night Projects. After a meal that I will truly never forget, we were lucky enough to be invited back to observe the kitchen's Saturday Night Projects. On most Saturday nights at Noma after a long week, a few of the chefs prepare a dish to put up for discussion and critique by their fellow chefs. The result is Saturday Night projects, a way for the chefs of Noma to exhibit and challenge their own creativity. Watching these chefs work was nothing short of incredible, and I feel so fortunate that I got to be there to experience it and take a few photos.

Drink Good, Do Good
This post was created in partnership with Naked Juice. All thoughts and opinions are my own.
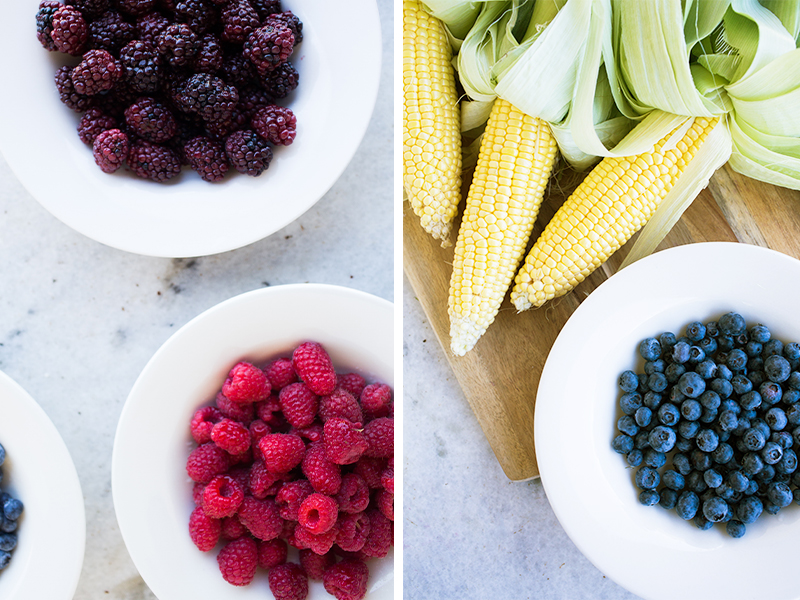
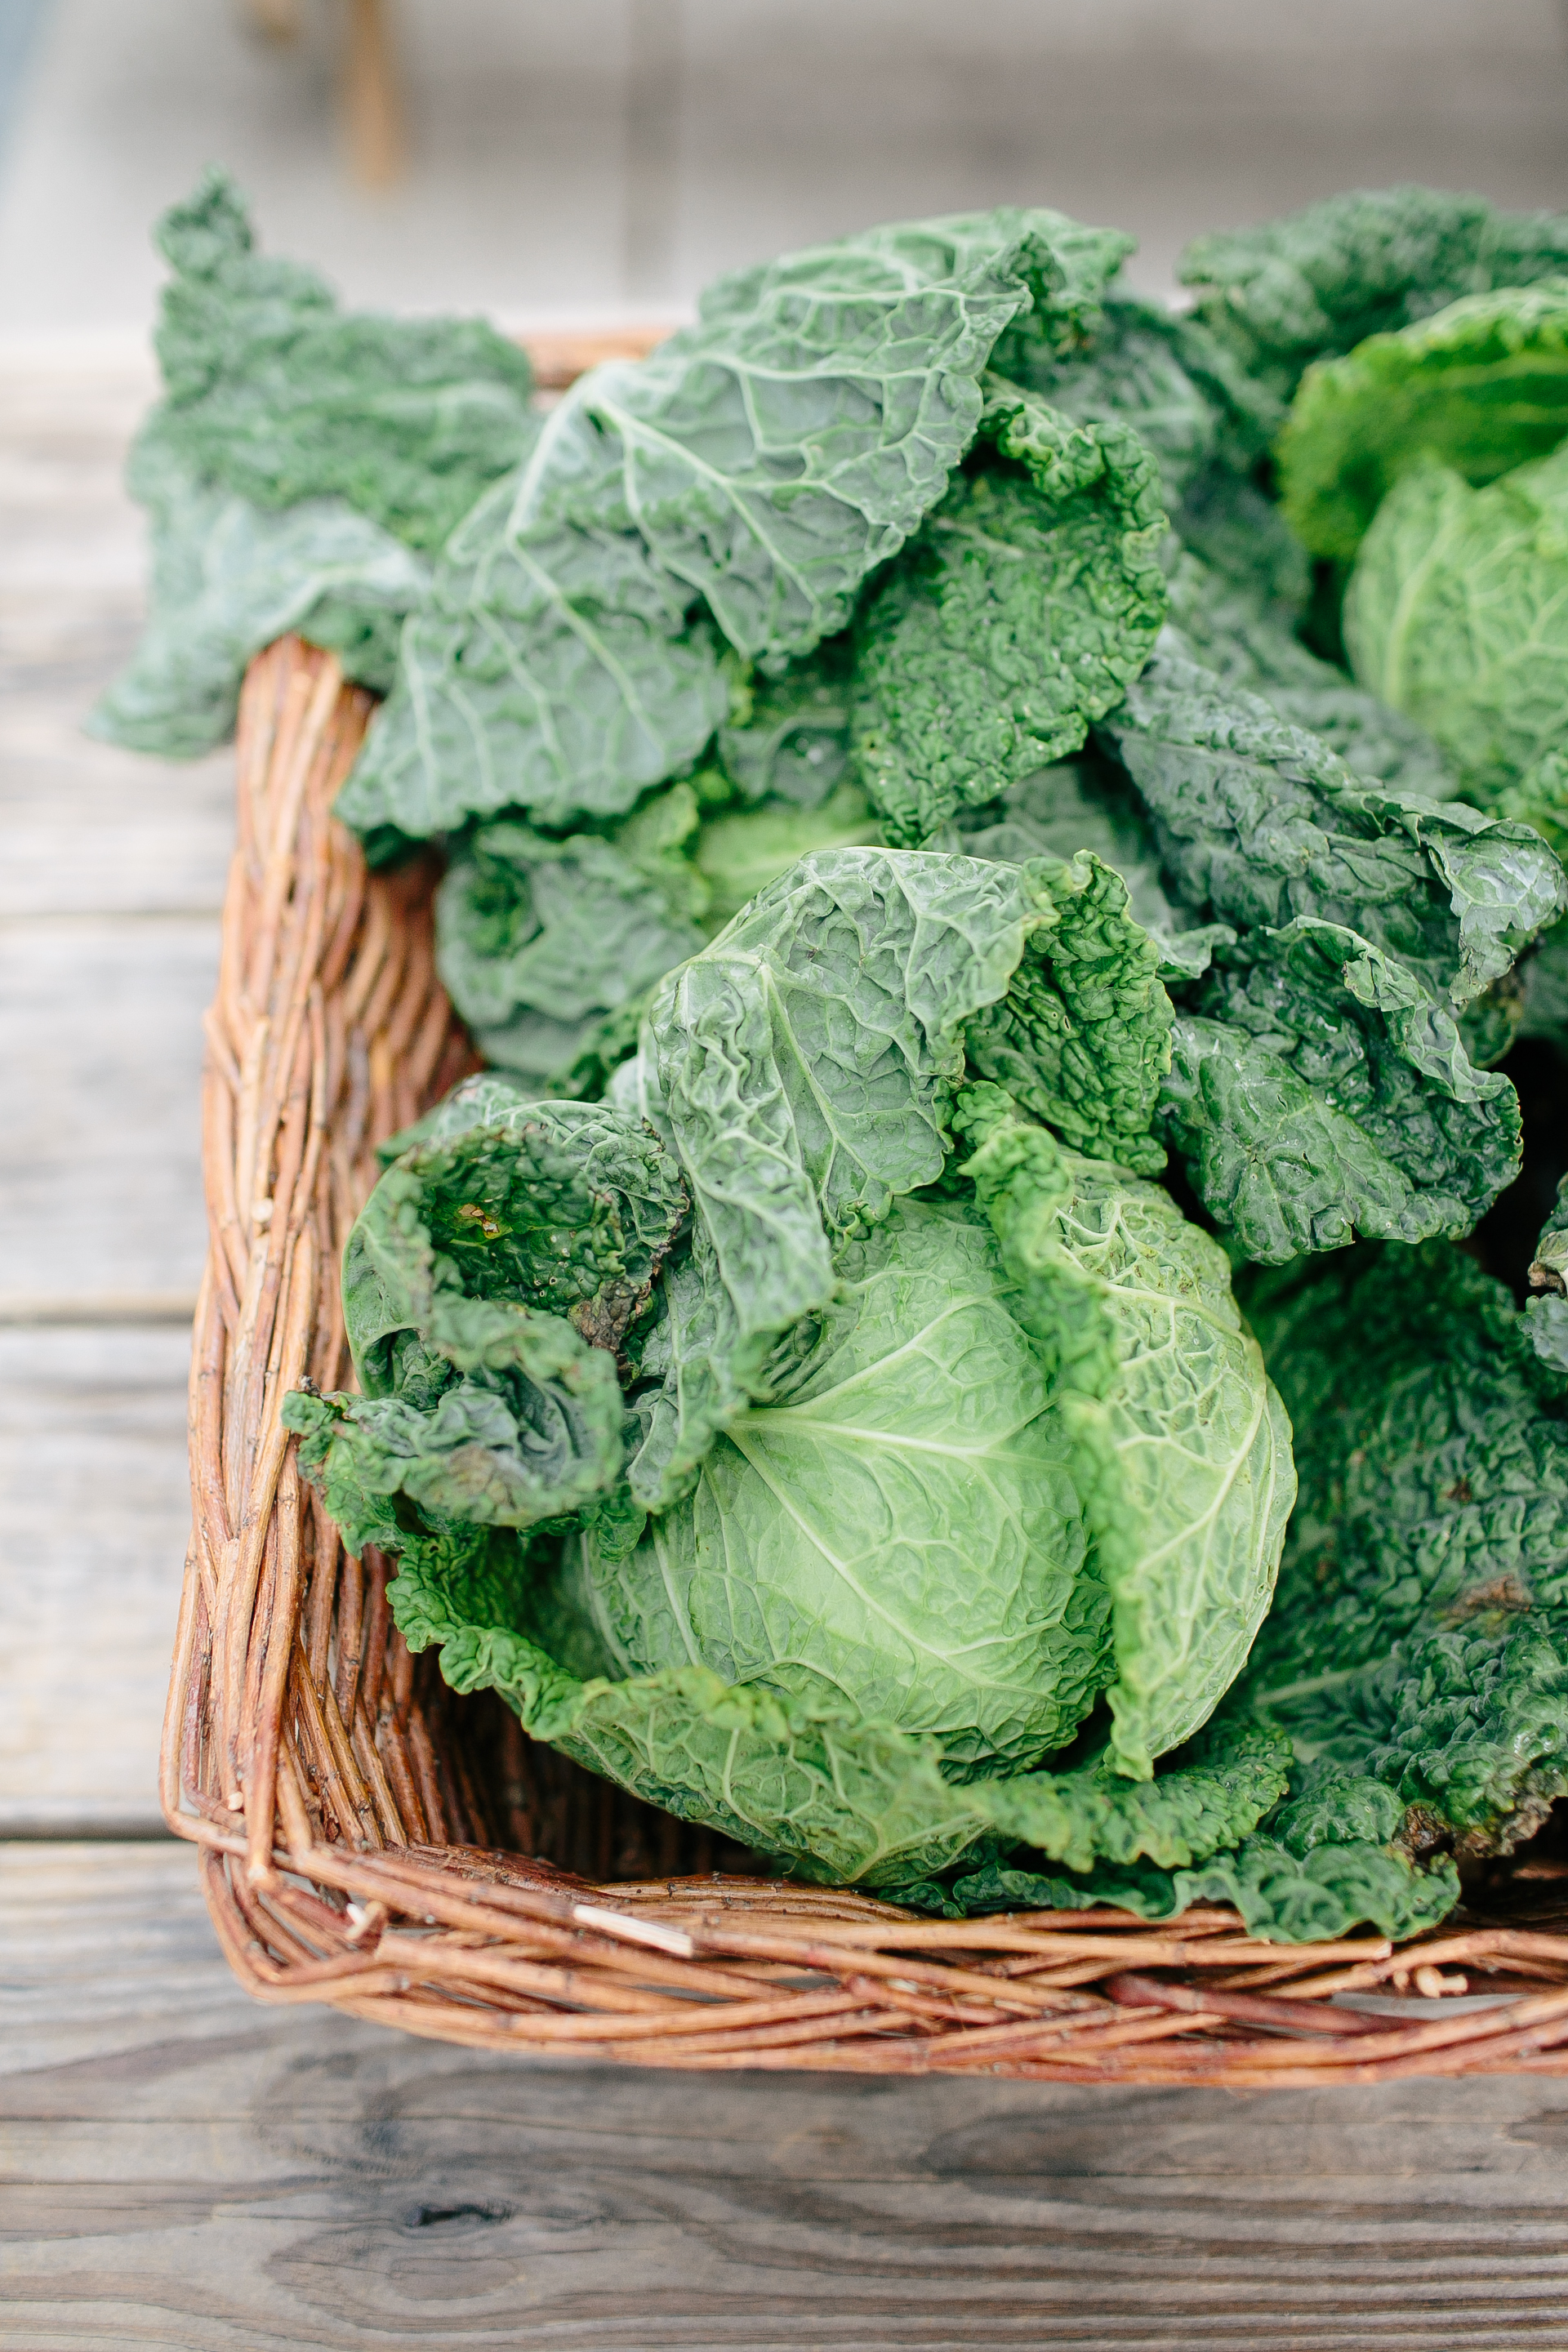
Today I wanted to share a little bit more about a cause that really means a lot to me. I am lucky enough to live in an area with plenty of grocery stores and markets around, but that isn't the reality for nearly 300,000 other people who live in the same city as me. It's staggering to think that this lack of access to healthy foods and produce is prevalent so close to home, but food deserts are a reality all across the U.S.
It's easy to take for granted (I know I do) how simple it is for a lot of us to access healthy food which is why I am really honored and excited to spread more awareness about these food deserts. I've teamed up with Naked Juice and Wholesome Wave on their #drinkgooddogood campaign. For every photo you post with a fruit or veggie, 10 pounds (that's a LOT) of produce gets donated to Wholesome Wave, a non-profit dedicated to eradicating food deserts in communities across the U.S. It's amazing that we can make such an impact nowadays just by using social media and sharing photos. Just snap a photo, and tag a friend to do the same (the Gather Tumblr has lots of fun inspiration). Let's make this happen together.
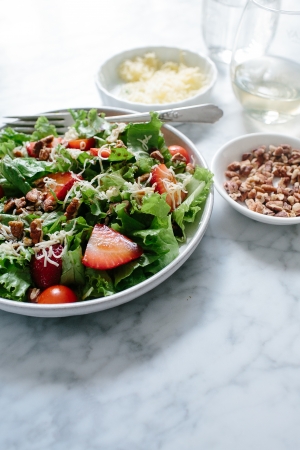
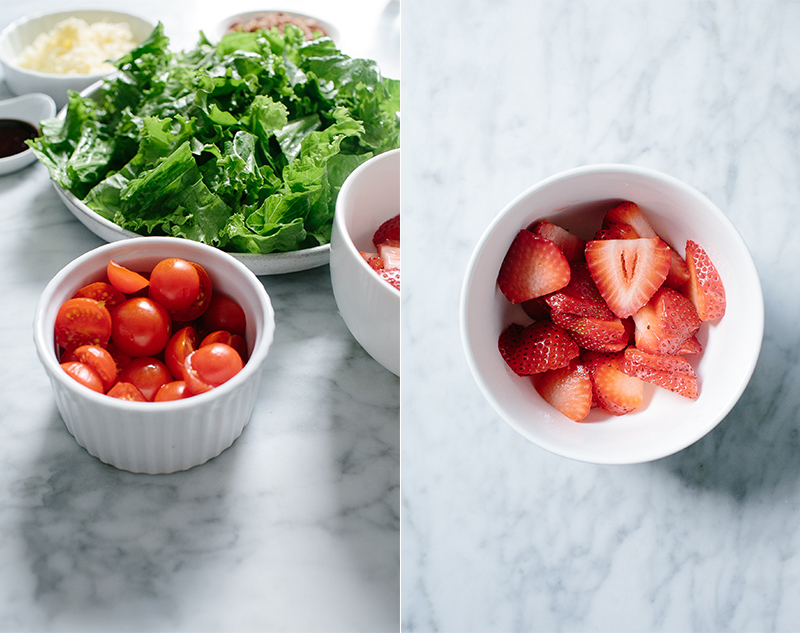
In honor of #drinkgooddogood, I thought I'd share one of my favorite, super-simple summertime recipes that incorporates a lot of fresh and healthy ingredients. This salad uses lots of great summer produce so it's perfect for this time of year. Enjoy!
Summer Salad with Honey Balsamic Vinaigrette
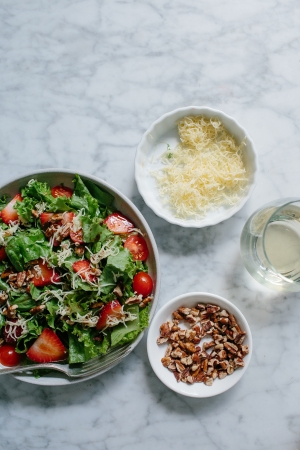
Salad: -2-3 hand fulls of lettuce -8-10 strawberries (sliced) -2 tbsp. grated sharp cheddar -1/2 cup of crushed pecans
Dressing: -2 tablespoons balsamic vinegar -1/3 cup olive oil -1 tablespoon honey -Salt and pepper to taste
Instructions:
1) Chop your lettuce into bite-sized pieces and place in a bowl.
2) Cut your strawberries into small flat slices, lengthwise. Optional: add in some slice cherry tomatoes or pears depending on the season.
3) Grate your choice of sharp cheddar cheese.
4) For the dressing, place all the dressing ingredients into a bowl and whisk together until well incorporated, making sure no honey is sticking to the bottom.
5) Place a portion of the salad mixture onto a plate and drizzle with the honey-balsamic vinaigrette. Finish by topping with the cheese of your choice. Simple and easy!